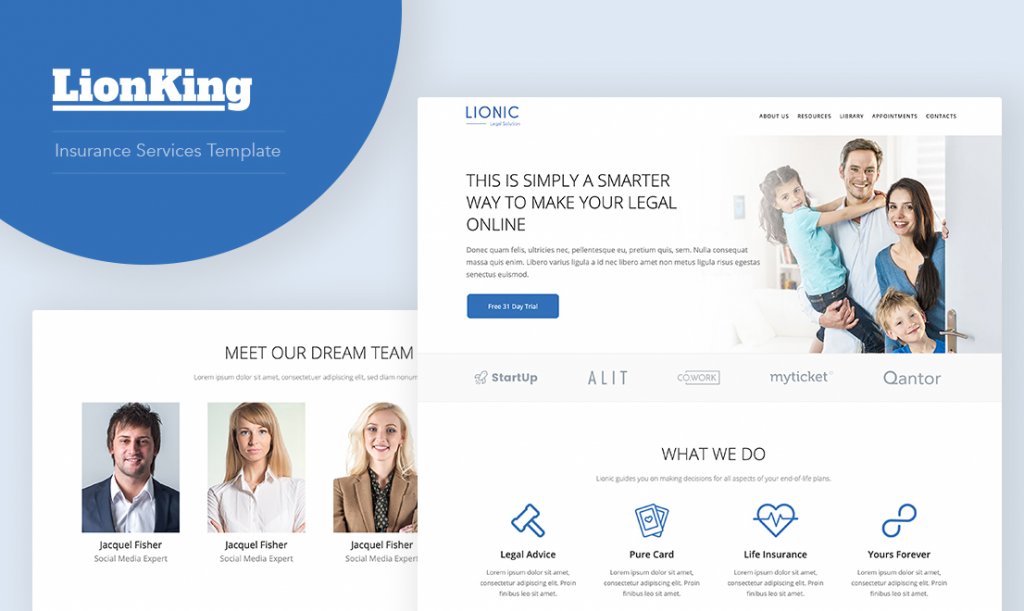
This guide will show you how to create a modern and professional looking website for such business niches as:
- Legal & Law services
- Advocate agencies
- Financial institutions
- Retirement & saving account services
- Loan & credit companies
- Tax advisory services
Step 1 – Creating Website
As market and technologies evolve now you almost do not need need to think about how to create the design of your website, make hundreds variations in Page Builder or find a hosting company to upload your WordPress website.
There are various prebuilt solutions that match almost any business so only thing you need to do here is to change texts some images and connect a domain name.
So now click on create website link below. Log in to your Kenzap Cloud account. Wait for the WordPress Credentials window to popup.
Then click on dashboard link to log in to your newly created website.
Step 2 – Introducing Elements
Note that this website comes with various predesigned layouts and pages like:
- call to action banner
- partners section
- 4 x services grid element
- other cool banners
- animated pricing table for corporate and private customers
- powerful call to action block
- employees section
- latest news element
- testimonials
- subscription form
- appointment calendar
- roadmap element
- privacy policy page
- global post search element
- contact us page
- office location
- and much more
Step 3 – Customizing Website
Now lets start customizing your website. Most of the pages and layouts described before can be found under Pages section.
For example, to edit homepage of your website go Pages > Home > Edit. Then click on any part of the layout your want to customize, for example banner and change the text in live.
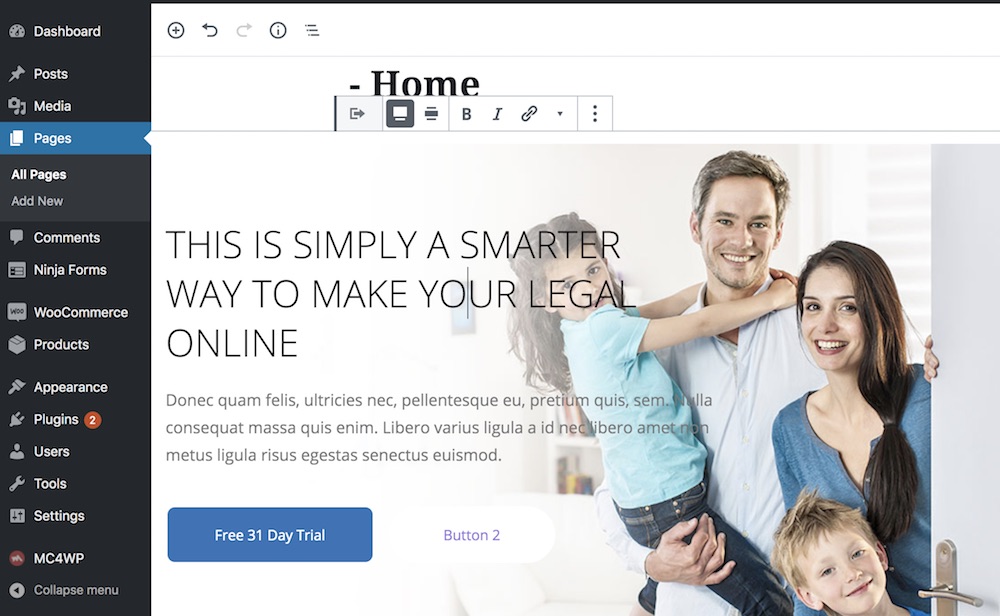
Some of the settings like changing background image are available under the right pane. Note that you can change the default position of your banner or simply use one color.
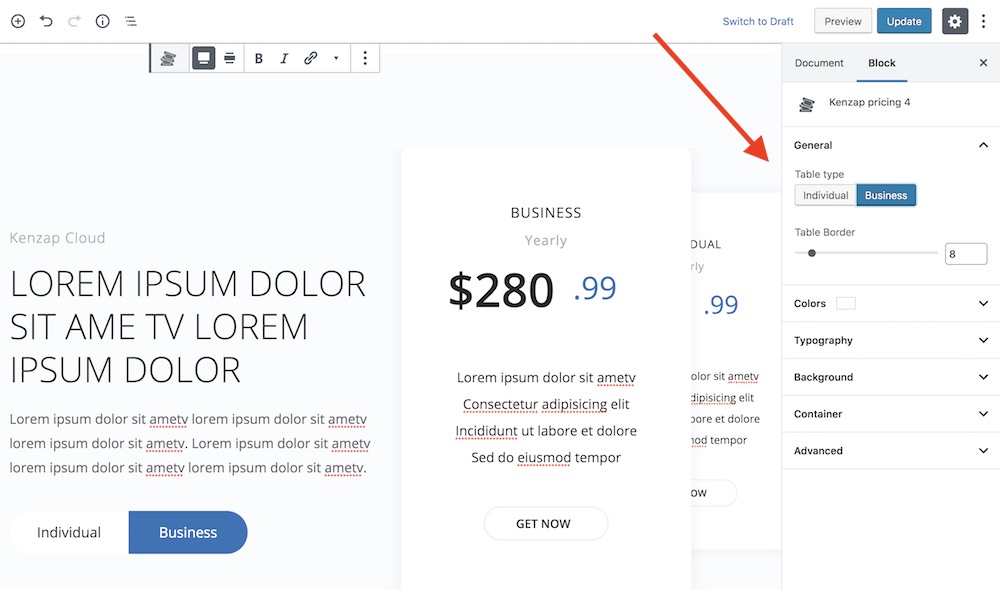
For example, if scroll a little bit down you will find two pricing tables. In order to choose which table to edit, individual or business you need to choose it from General tab > Table type under the right pane.
Step 4 – Other Useful Stuff
While the steps mentioned before might be all you need to create your personalized website check the resource below that may help you extended default functionality.
- How to Register & Connect GoDaddy Domain Name with Kenzap Cloud
- How to Add Two Image Gallery in Your WordPress Website (Step by Step)
- How to Temporary Disable & Hide Gutenberg Blocks from Preview
- How to Add a Stunning Looking Testimonials Slider to Your Website
- How to Create Beautiful Event Calendar in WordPress