Do you need to sell cosmetics products online but current solutions seems either too complicated or expensive? If the answer is yes then this small guide will explain you in details the most fastest and easiest way of creating your website for cosmetic industry.
With this website you will be able to:
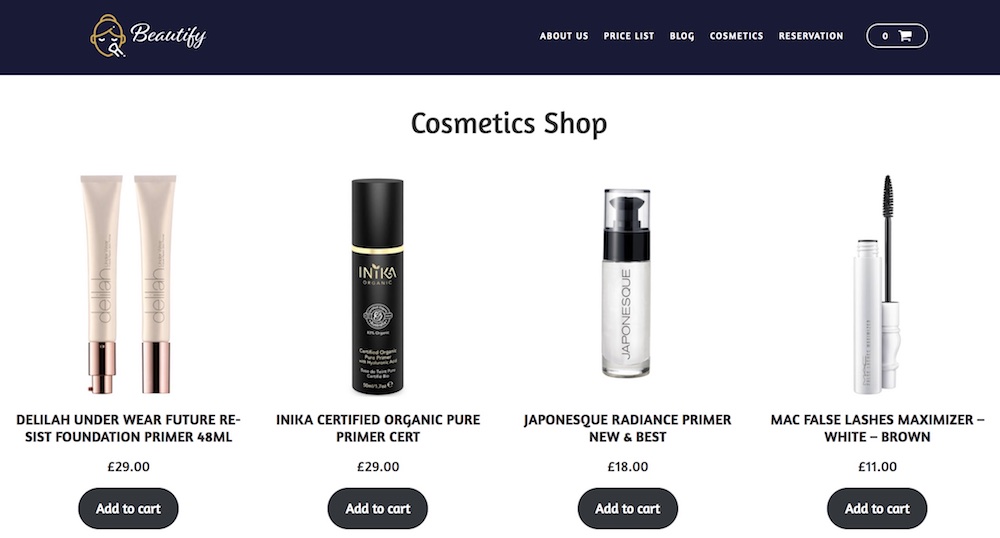
- List cosmetic products such as moisturizers, primer, foundations, concealers, blushes, eyeliners, creams etc.
- Set custom prices, stock availability, product variations and shipping zones by location.
- Showcase your products with the help of various gallery layouts.
- Have your own cart and checkout pages.
Step 1 – How to Start
In order to create your first online selling shop you only need to deploy it in cloud or under your hosting provider. While setting up custom server environment may require additional time to deploy website in cloud you only need to click the button below:
After clicking on the button above you will be redirected to your account page with popup window containing your WordPress website credentials. Use them to access your dashboard.
Kenzap cloud is perfect for development, testing and performing initial customizations. It also gives you migration freedom to your hosting provider later on.
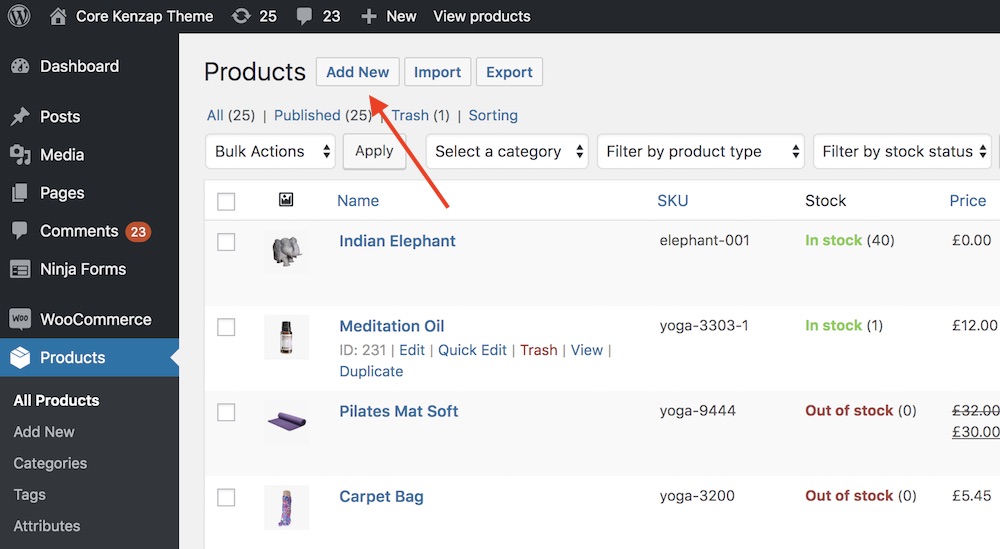
Step 2 – Listing First Product
Now then your online shop is up and running you need to list your first products. Go to Products > Add New to create your first cosmetics product as shown on the image below:
Under product creation page provide the following information:
- Product name
- Product short description
- Product categories and tags to structure and link relative products (right pane)
- Product image (right pane)
- Product regular price and inventory
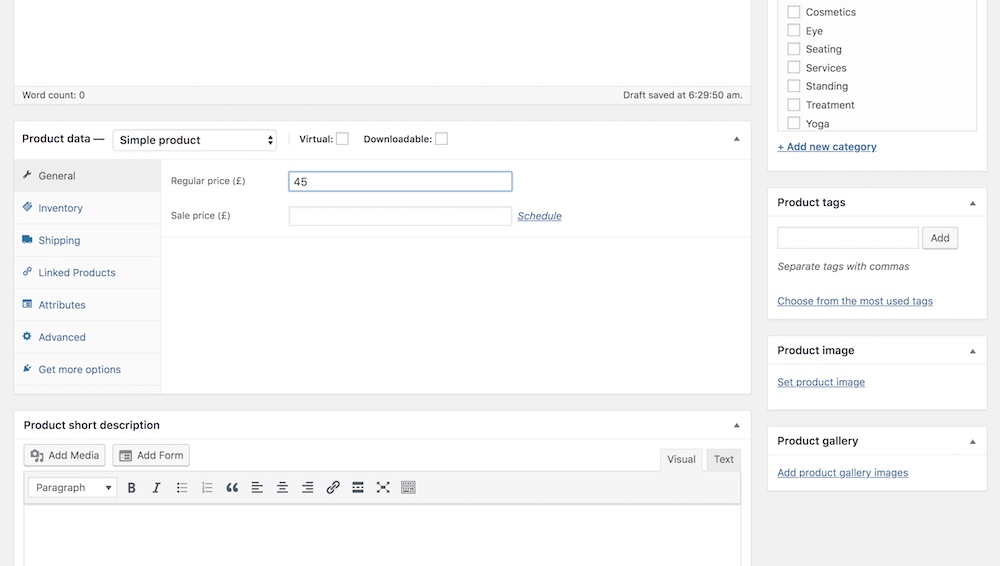
Once all the data is filled in click on publish button in the top right corner. You should now be able to see your product under shop or cosmetics page of your website:
- http://your_cloud_id.kenzap.com/shop/
- http://your_cloud_id.kenzap.com/cosmetics/
The cosmetics page is accessible from your website’s dashboard Pages > Cosmetics > Edit.
At this stage you should be already able to add your product to the cart and proceed to checkout page with payment upon delivery option. In order to start selling and collecting payments you need to follow steps 3 and 4.
Step 3 – Domain Name Registration
Once the technical background of your website is created and all your products are populated you may need to connect your domain name. This step is inevitable if you want to focus on your brand promotion before starting sales and before connecting billing system.
There are thousands of authorized registrars that may help you to achieve this goal. Refer to the one that is most appropriate in your case. Once the domain is registered you may need to point it to your cloud website.
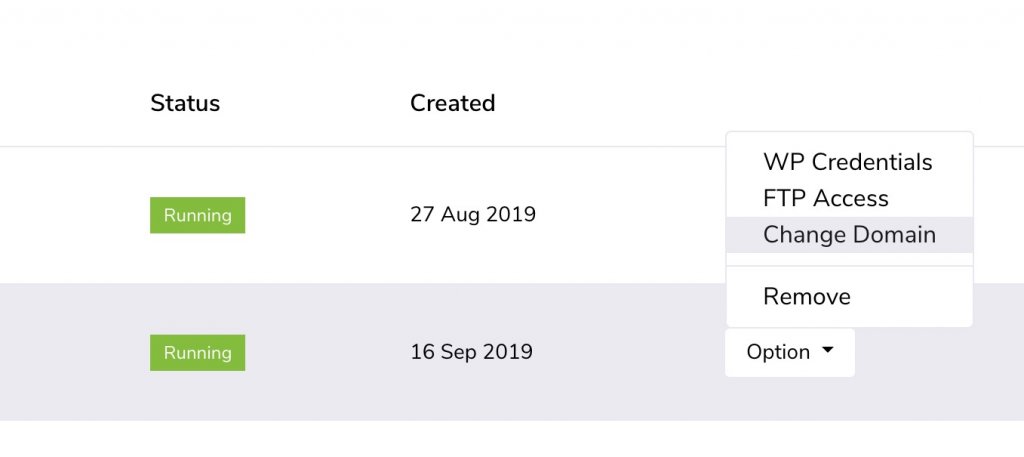
Click on Change Domain option from cloud tab of your Kenzap account to assign the your domain name. Follow the instructions from the popup window.
Step 4 – Connecting Billing System
One of the most crucial and important steps of running your online cosmetics shop is to have a reliable and secure billing system to collect payments. Before choosing right billing gateway solution these things should be considered:
- Average volume of sales you plan to have with your shop on monthly basis
- Country of incorporation of your business
- Your client geography and their preferred ways of payment (PayPal, Credit Cards, Wire Transfers etc.)
The checkout process of your website is backed by woocommerce plugin that support more than 30+ various payment gateways. Refer to each of them to see their terms of service, commission rates and integration guides.