This guide will explain step by step how to create your own website for architecture agency. With this website you will be able to:
- Create animated sections with texts and images that highlight your specific services
- Showcase your portfolio in a grid, masonry or metro like fashion
- Choose among 7 various blog post layout styles for news and latest updates
- Load customer testimonials
- Create contact forms with professional looking email notifications
- Add subscription newsletter forms
- List your employees and desired social networks
- Change images, color schemes and language
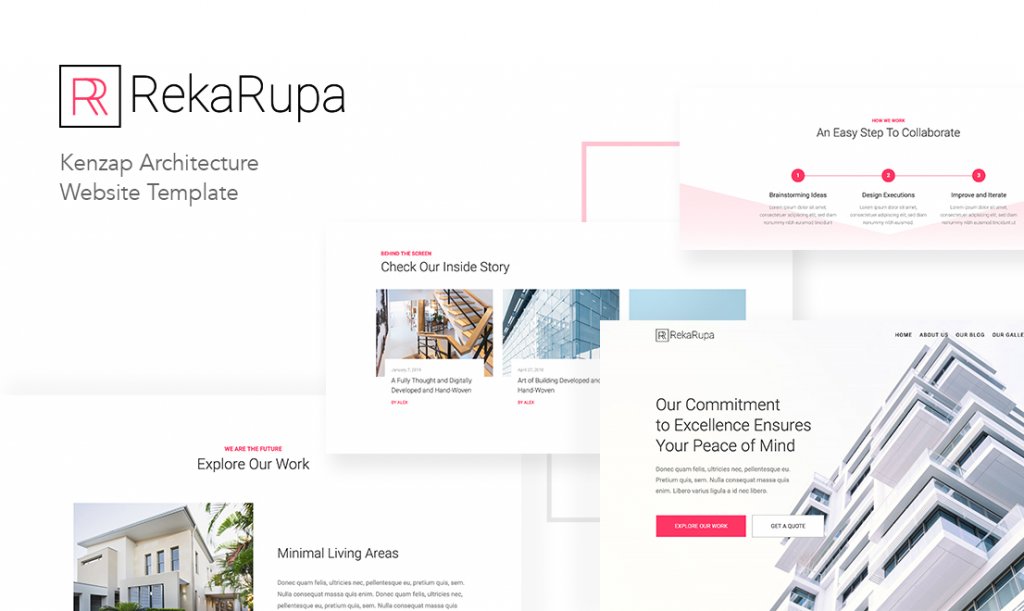
You can click on this live website preview to see the demo content example of the website you are going to create. The classic way of creating a website that you may have already encountered in other guides available on the Internet today typically cover these procedures:
- Domain registration
- Hosting plan purchase
- Template or WordPress theme purchase
- Theme demo content installation and debugging
While the above mentioned steps are still widely used the whole process can be optimized or done in an opposite way. You can create your website under Kenzap Cloud without domain registration, hosting purchase and theme installation.
Step 1 – Creating your Website in Cloud
Kenzap Cloud provides unique opportunity for you to create a complicated website with everything preinstalled while enjoying open source WordPress freedom of migration to your own hosting any time you want.
So the first and the only step required to create your website is to hit the create architecture website button below.
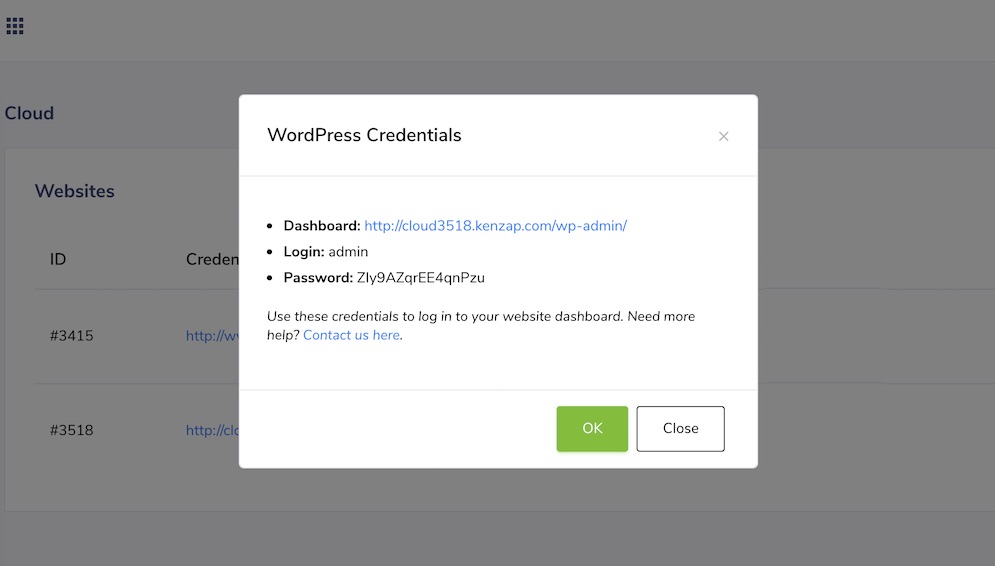
After this step you will be redirected to your Account page. Wait for ~30 seconds for the template to install. Then you will see a popup message with WordPress credentials and a login url to your newly created website.
Use these credentials to access your WordPress dashboard. See the example image below:
Step 2 – Customization
Once you are under your website dashboard you can start customizing your pages, unique feel and look.
For example, to change something on the homepage go to Pages > Home > Edit to enter editing mode. This template is built using latest content editing technologies. At its core it uses modern development language React and a Gutenberg content editor.
As a result all customization should not be complicated and occurs in live. Simply click on any text or image you would like to change and change it.
Step 3 – Domain Name
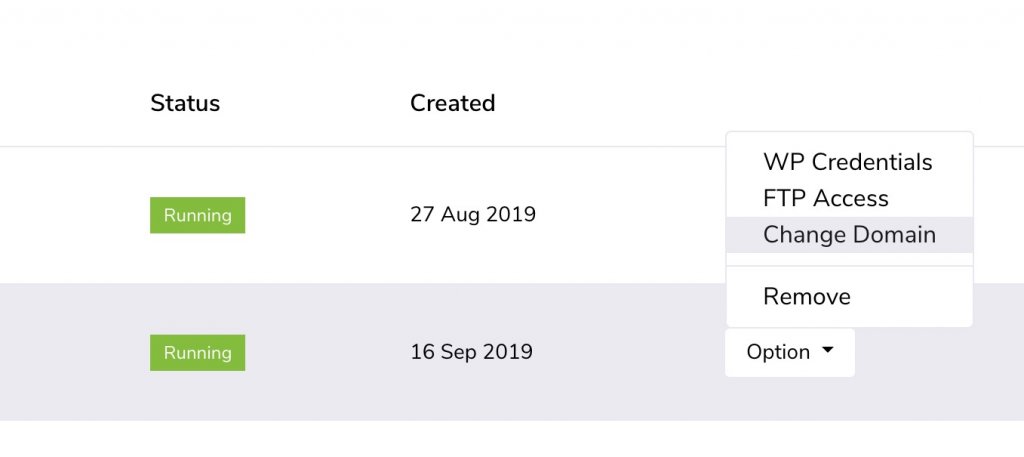
You probably have already noticed that your website is using custom url as a domain name. If you already have your domain name or would like to create a new one you can easily replace this url.
- Use any domain registrar to register the domain name
- Follow instructions on how to point your domain from your account page
Step 4 – Migration
While many our customer enjoy our products some of them need to use other hosting companies. In case you can use WP import/export tool in order to exchange and sync customized content between two WordPress hosts.