If you plan to organize an event, performance, match, concert, competition you may need to integrate a hall layout into an interactive module on your website where users can book and checkout tickets per seat.
In order to create and integrate layout you may need the following things:
- An example image of your hall, stadium layout
- Visit MyTicket account
- Draw interactive zones on top of layout image
- Assign seats for each zone individually
- Install MyTicket Events plugin on your website and add MyTicket Hall block
- Export layout code from MyTicket account into MyTicket Hall block
Draw Interactive Zones/Sections on Top of Layout Image
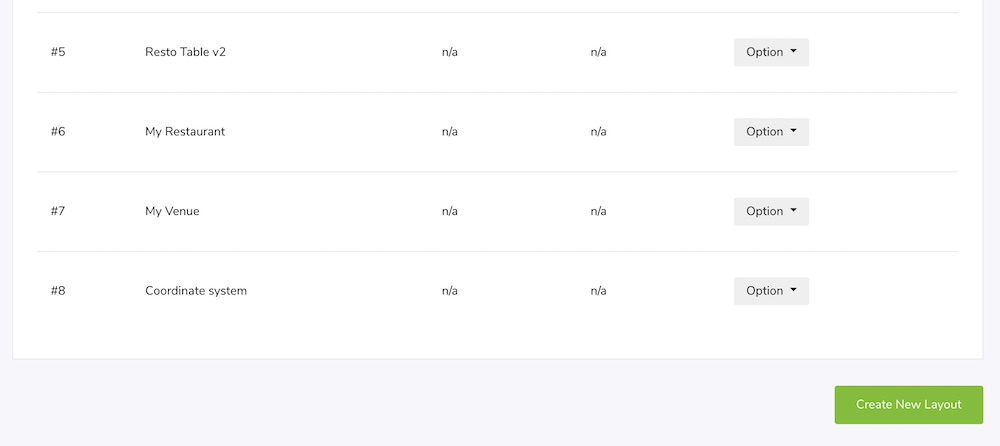
First make sure you are signed in under MyTicket account. From there click on Create New Layout button as show on the image below and enter requested information about the layout.
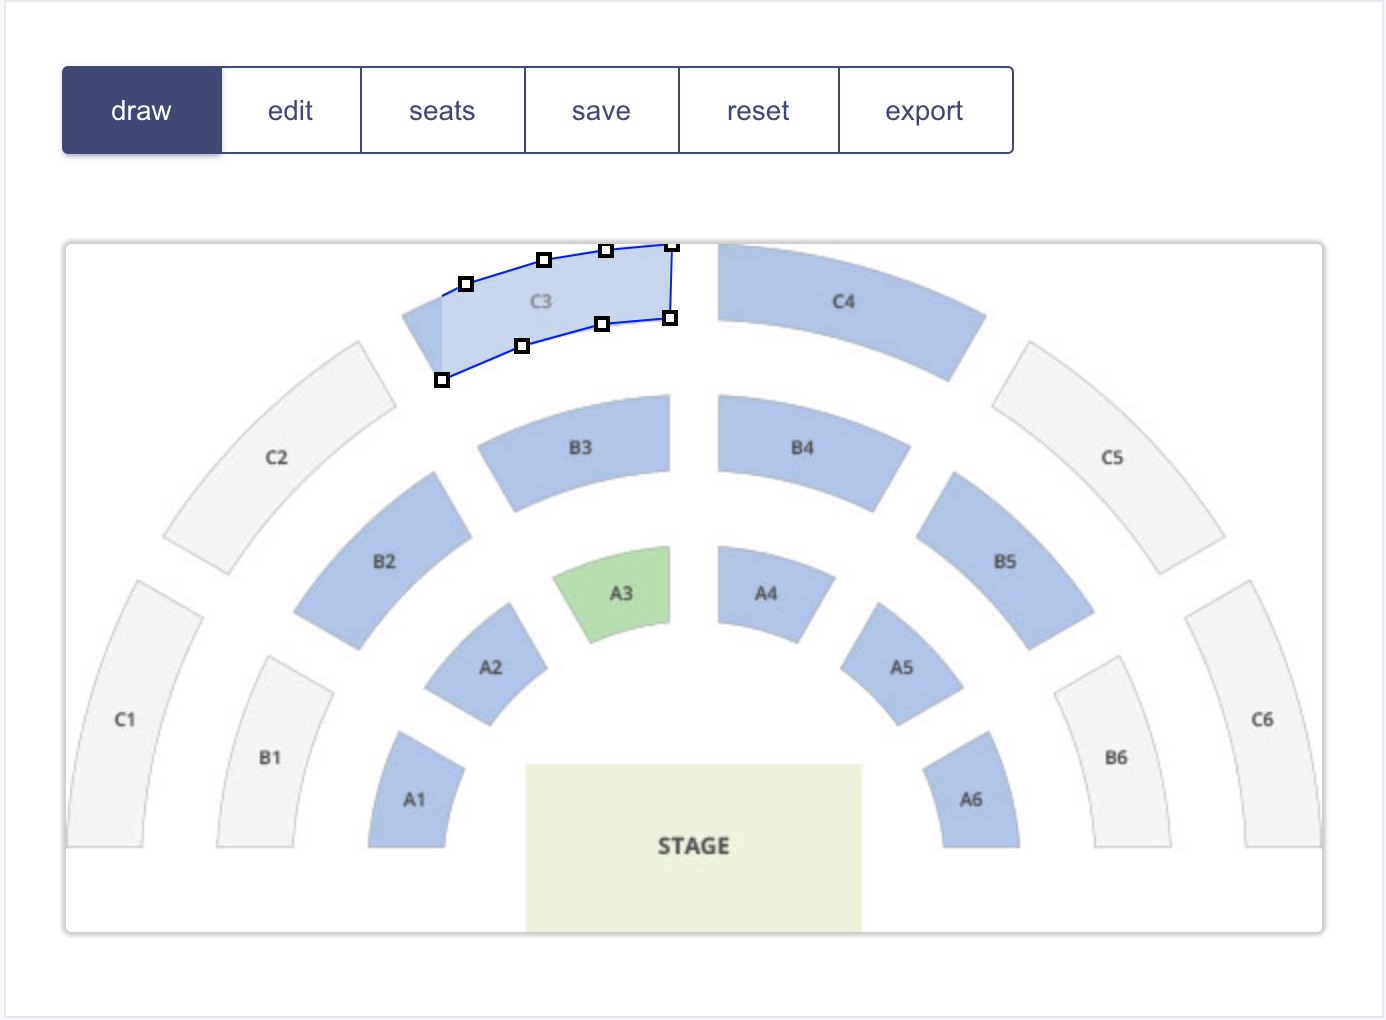
Once the layout is added to the list click on option > edit to start drawing zone. On next page upload your layout image click draw button and start highlighting layout zones. Click on mouse to fix the point or ESC button on your keyboard to cancel drawing. The last point should match with the first point. After match occurs your zone is created. In case you want to adjust the points click on edit button and then click on points your want to relocate. You can also click on DELETE button on your keyboard to remove zone completely. Once all your zones are completed the final result may look something like displayed on the image below.
Assign Seats for Each Zone Individually
Next step is to assign seats to the created zone. Click on Seats button above the layout image and choose zone to which you need to assign seats. Choose zone/section title and the amount of seats you want to create. After the operation you will all your seats located in one place – top left corner of the screen. Simply start drag and drop each seat one by one and distribute evenly inside the the section with accordance to your requirements. Use top toolbar for setting up addition parameters. Perform similar operation with all of the zone.
All changes are saved automatically to the backend so you can access your recent changes whenever you come back to the website but before you leave the page it is recommended to click save button to make sure that changes are saved.
Preview Layout on Your Website
The last step is to install MyTicket Events plugin on your website and add MyTicket Hall block to your page. See example image below.
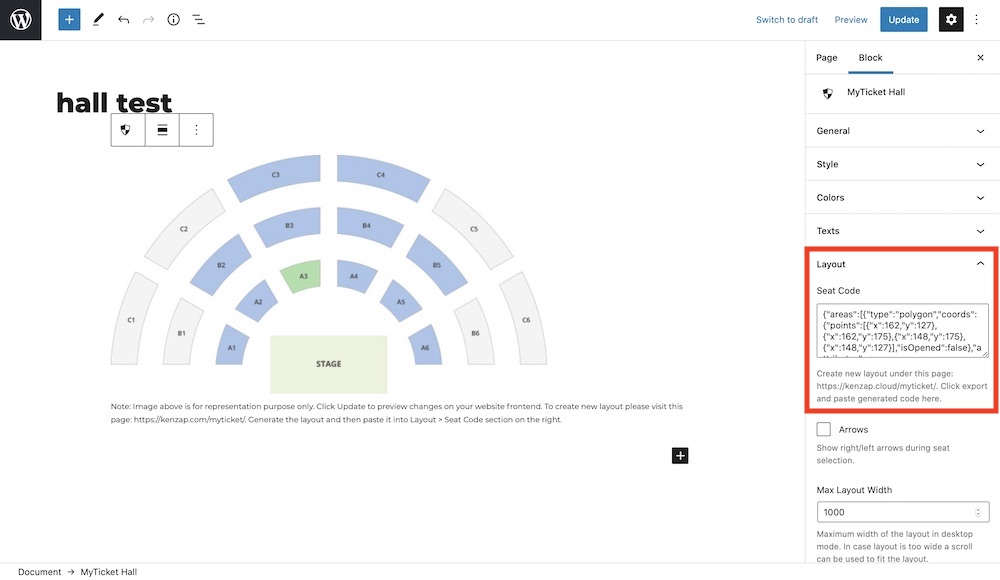
No go back to your MyTicket account and click on export button to generate layout code and paste it under MyTicket Hall block tab on the right side in Layout > Seat Code setting. Hit update button and follow further instruction on how to adjust the layout according to your needs.
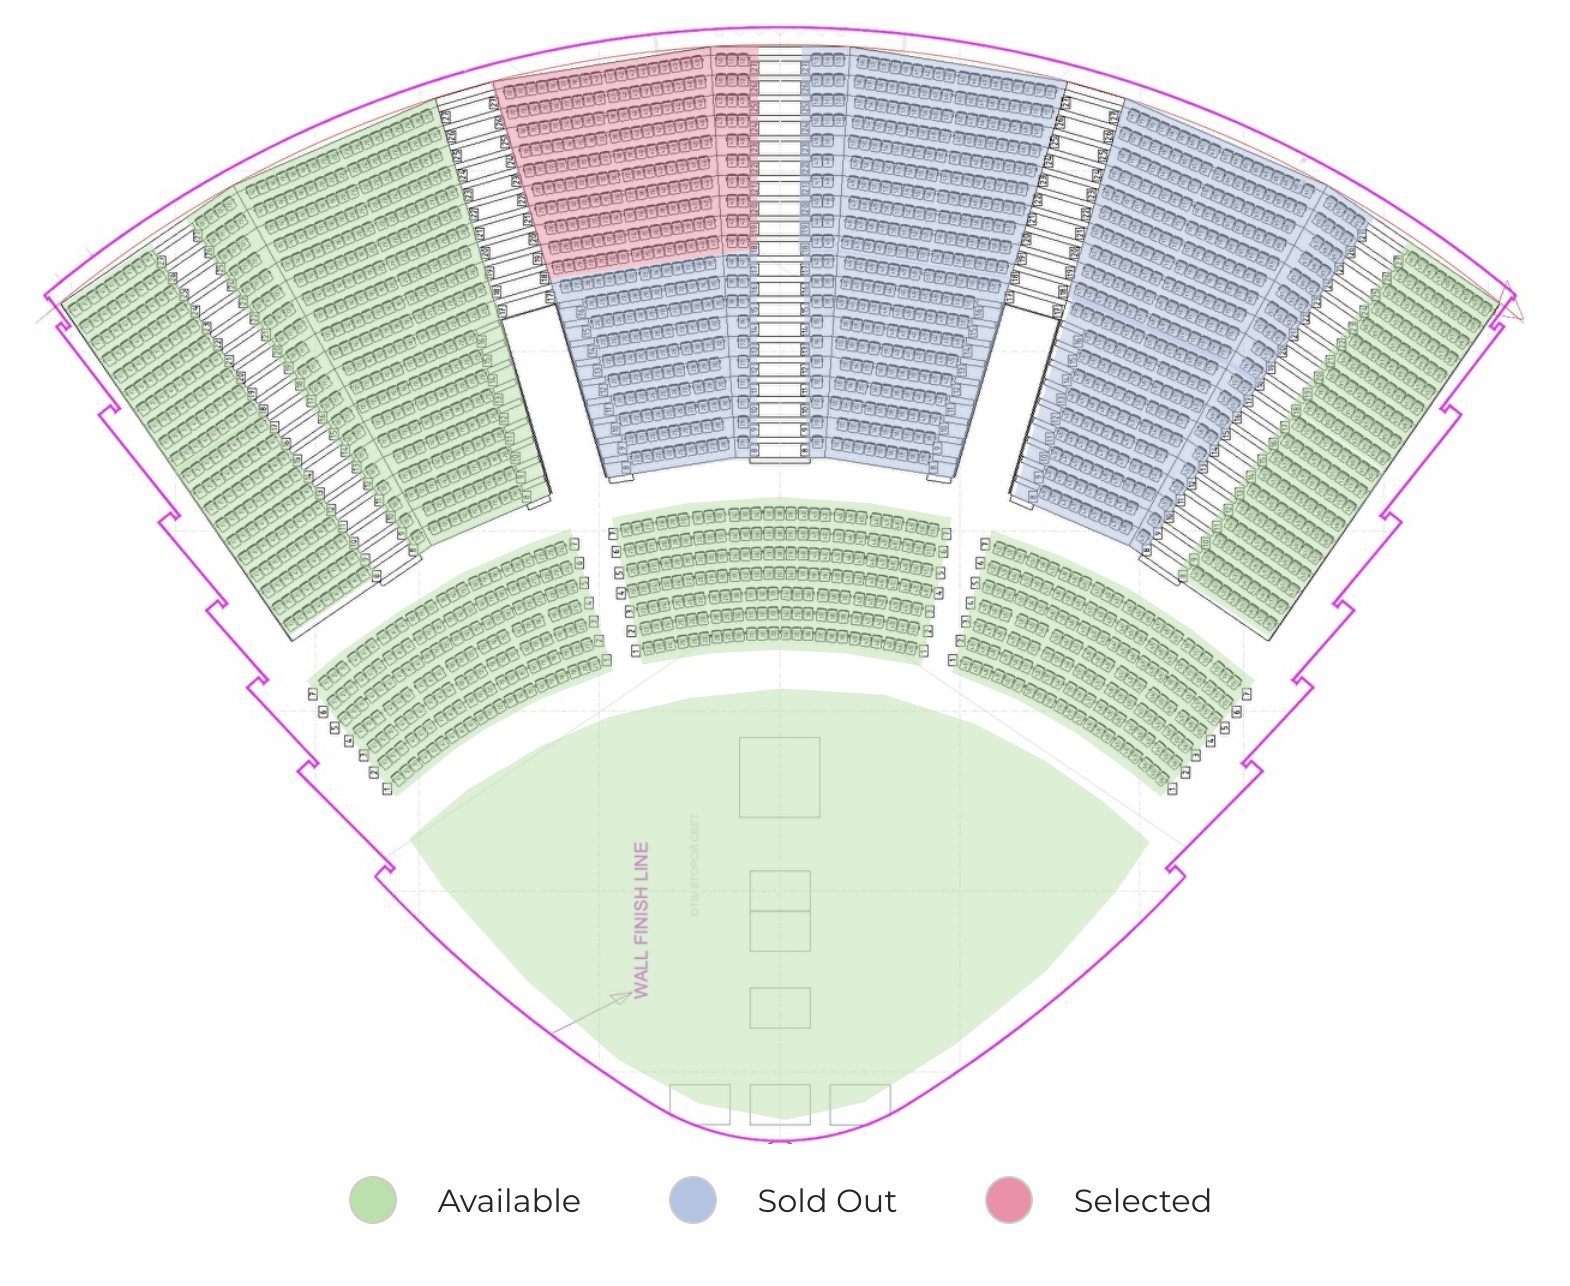
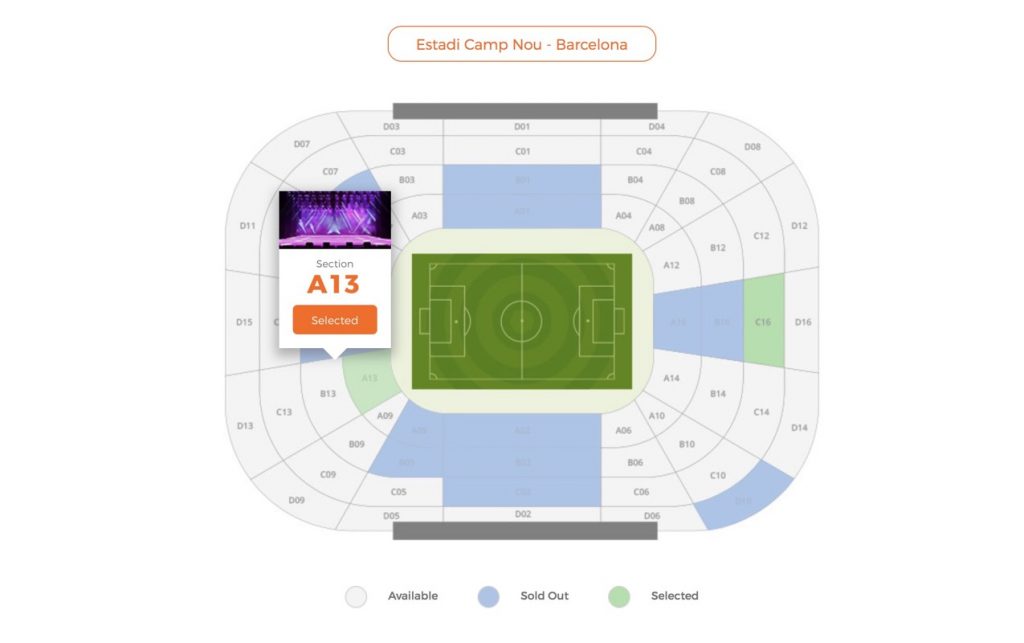
Upon request it is also possible to integrate exclusive design of halls and stadiums for interactive seat selection. See the image below for example.
Need more information feel free to post a comment below or submit a new topic under MyTicket forum.