This article is about creating a minimalistic website and publishing it online using WordPress Content Management System (CMS). There are hundreds of other competing articles online with similar topics so lets first highlight what are the main differences here.
Probably you have already noticed the word minimalistic in the title of this article so this means that our main goal is to rely on third party components and plugins as less as possible.
Why Minimalistic?
WordPress became notorious for its performance issues and some inconsistency related to content customization. While actually WordPress can work very fast custom themes, plugins, cheap hosting can slow down its performance dramatically.
After Installation..
- you can create blog post articles, pages with latest Gutenberg editor formatting tools.
- you can customize typography by choosing best font pairs that are hosted in Google CDN.
- you can apply various beautiful color schemes to all texts and elements with one click.
- you will have access to thousands of additional Gutenberg blocks like testimonials, newsletters, banners, contact forms etc. optimized for this installation.
- you will have website that loads in less than 1.5 seconds over different continents.
- you will have minimalistic Kenzap Core theme that maximizes website performance.
1. Choosing Right Server
Server, cloud, hosting all these words mean one thing when it comes to calling a place where website files are stored and served to the public. Most of the hosting providers that claim to be WordPress optimized are typically shared hosting environments where thousands of website are stored.
The optimization is hidden under setting up correct server configurations and providing some additional tools that might be useful when working with WordPress.
While this approach is the cheapest and most likely the easiest to start with you may experience certain limitations later on. For example, by having restricted access to actual server resources that are evenly allocated among all other server users or limited server configuration capabilities.
You may especially notice this when you need more performance from the server or when your website serves large amount of audience. If you are not sure that this is the right solution for you then Virtual Private Servers (VPS) might be the answer.
Technically VPS share same principal as shared hosting where there are multiple VPS instances running on a single physical server. The main difference here is that VPS gives you access to your own operating system like Ubuntu or CentOS with much flexible customization freedom. Refer to this article VPS vs Shared Hosting for better insights.
2. Preparing Environment
Once you know where to host your website its time to install WordPress. Probably no one else then WordPress itself knows it better how to install their own product so may follow their guide first on How to install WordPress.
Some cloud and hosting companies provide preinstalled WordPress options including Kenzap Cloud. So if you do not want to hassle with installations and server troubleshooting simply hit on install minimalistic core theme here and you are up and running.
Alternatively you can download this theme here. Under your account find a PDF instruction manual. Follow it on how to install theme from your WordPress admin.
3. Publishing First Content
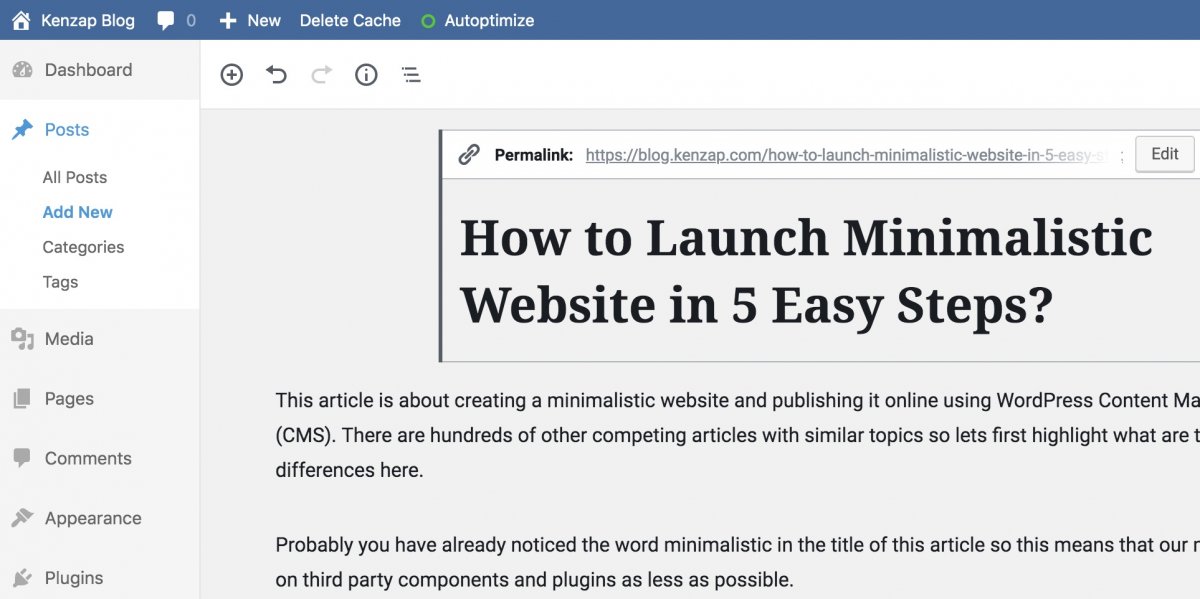
Now that all the required components are installed it is time to create your first blog post article or a page. Log in to your freshly installed WordPress CMS then go to Posts > Add New to create first blog post article with the help of Gutenberg editor.
4. Adding Extensions (optional)
At some point you may need additional functionality for your website. This might be a contact form a block with client testimonials, a booking calendar or a beautiful full screen parallax banner. While you are free to choose any solution out there we recommend you first choose something from our extension gallery as:
- Extensions are compatible with Gutenberg editor.
- Extensions are verified by official WordPress review team.
- Extensions are part of Kenzap Core theme design system.
- Extensions are optimized for performance.
Note that while all extensions have their own set of customization parameters like background, color, typography and other extension specific settings it is recommend that you define your design system first that is available under your WordPress admin Appearance > Design System.
5. Turning on Caching (optional)
Caching is important but it may not always be needed. Important to note that while your website is in development mode it is recommended not to turn any caching or minification plugins as it may prevent the changes to reflect immediately on your website.
In order to understand how slow or how fast your website loads from different locations of the world you can use free Pingdom Tools service.
After you performed the test lets do some optimization which includes.
- Unite and minify JS, CSS assets.
- Minify HTML.
- Turn image asynchronous loading (lazy loading).
- Cache some dynamically generated content.
Note that the list above can be longer but because you use Kenzap Core theme and Kenzap extensions this should be sufficient in order to load any page of your website within 1.5 seconds between different geographical continents. For example, with server located in Singapore and user’s browser located in Frankfurt.
Most of Kenzap extensions do not rely on PHP and server rendering while Kenzap Core theme registers no custom shorcodes or loads custom asset files like fonts, CSS, JS.
Now lets install two missing plugins:
- Autoptimize – to minify CSS, JS, HTML and image lazy loading.
- WP Super Cache – to cache dynamically generated content.
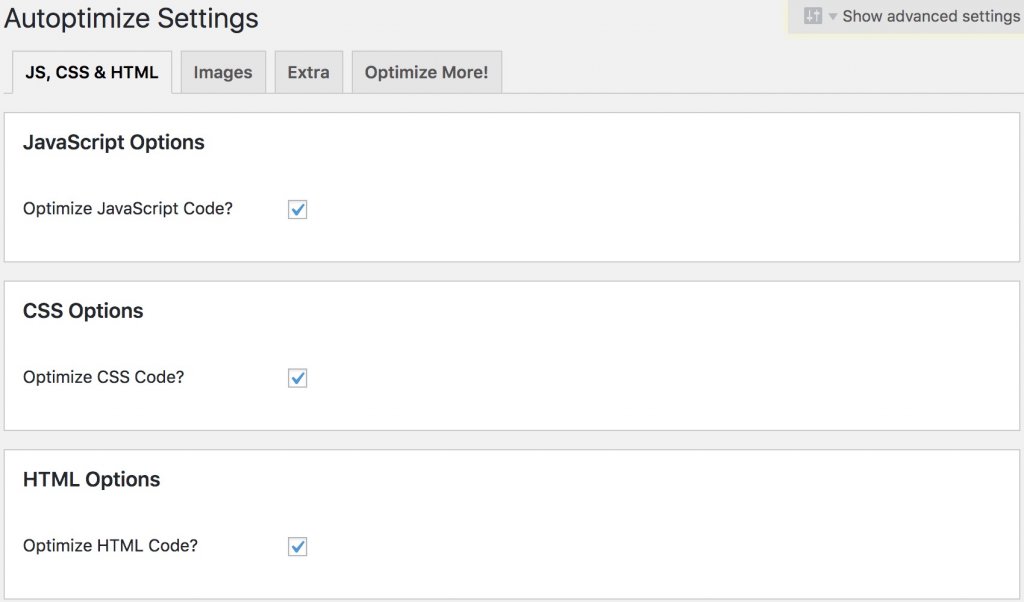
Autoptimize
Note the settings of autoptimize plugin of JS, CSS & HTML tab. All checkboxes should be enabled. In addition to that, go to Images section to enable image lazy loading setting.
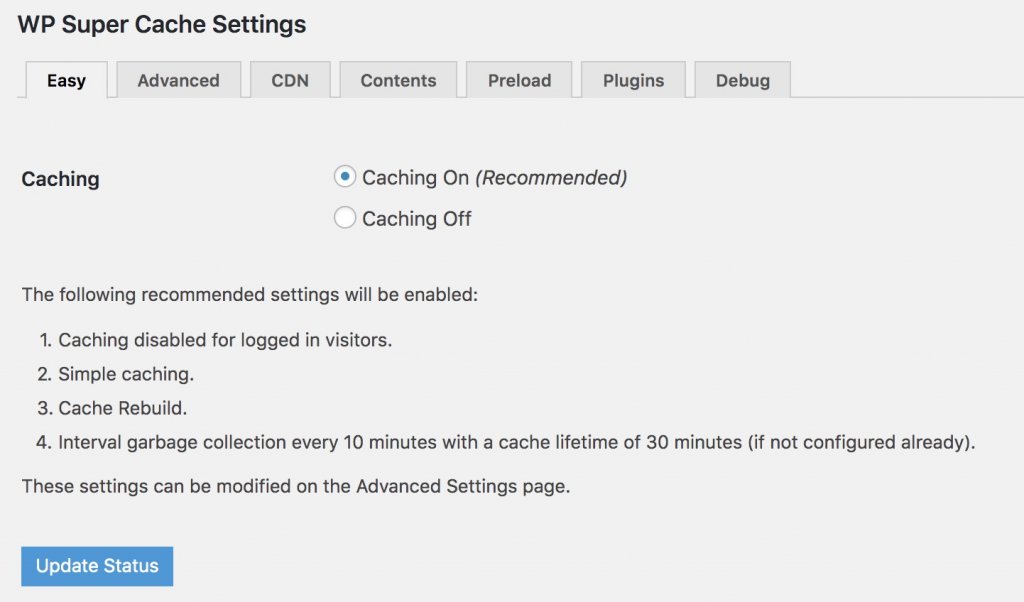
WP Super Cache
WP Super Cache plugin is mostly used to cache dynamically generated content. Refer to the image below to see how the enabled plugin.
After these two caching plugin are enabled check your website loading speed again to compare the difference.