This article will explain you how to find, register new domain name with the help of GoDaddy registrar as well as to point it to any of your existing Kenzap Cloud websites.
If you haven’t yet created a website you may want to read one of these articles too:
- How to Create a WordPress Blog in 30 Seconds
- How to Create a Website for Selling Cosmetics
- How to Create a Website for Architecture Agency in WordPress
Note that if you already have your domain name registered with GoDaddy you can skip step 1.
Step 1 – Domain Registration
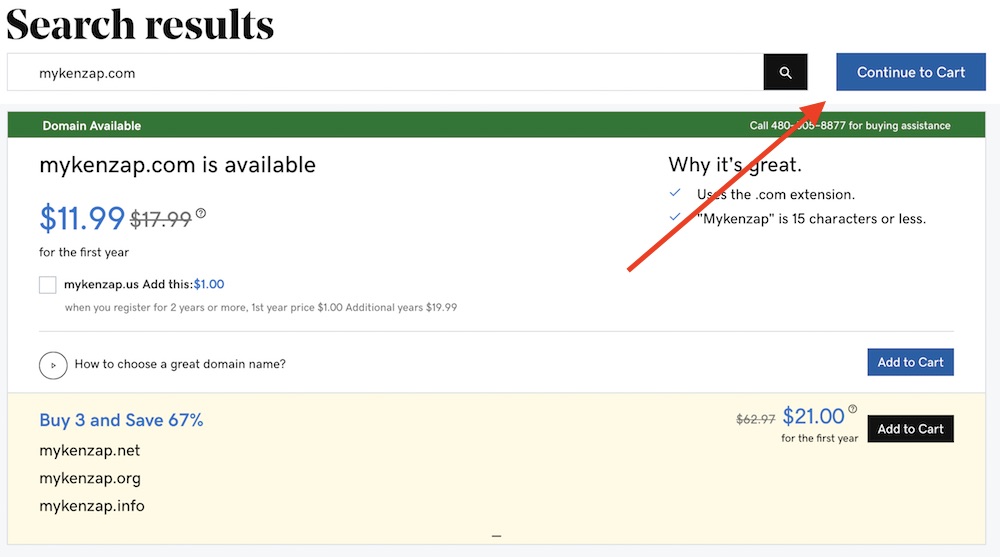
- Go to www.godaddy.com > sign in or sign up to access your account.
- Then go to https://www.godaddy.com/domains page to find your domain name.
- Click search button.

- If your domain name is available just click on Continue to Cart button to finalize the purchase.
Note that in this article we will use mykenzap.com domain name. Whenever you see it on the screenshots of this article make sure there is your registered domain name.
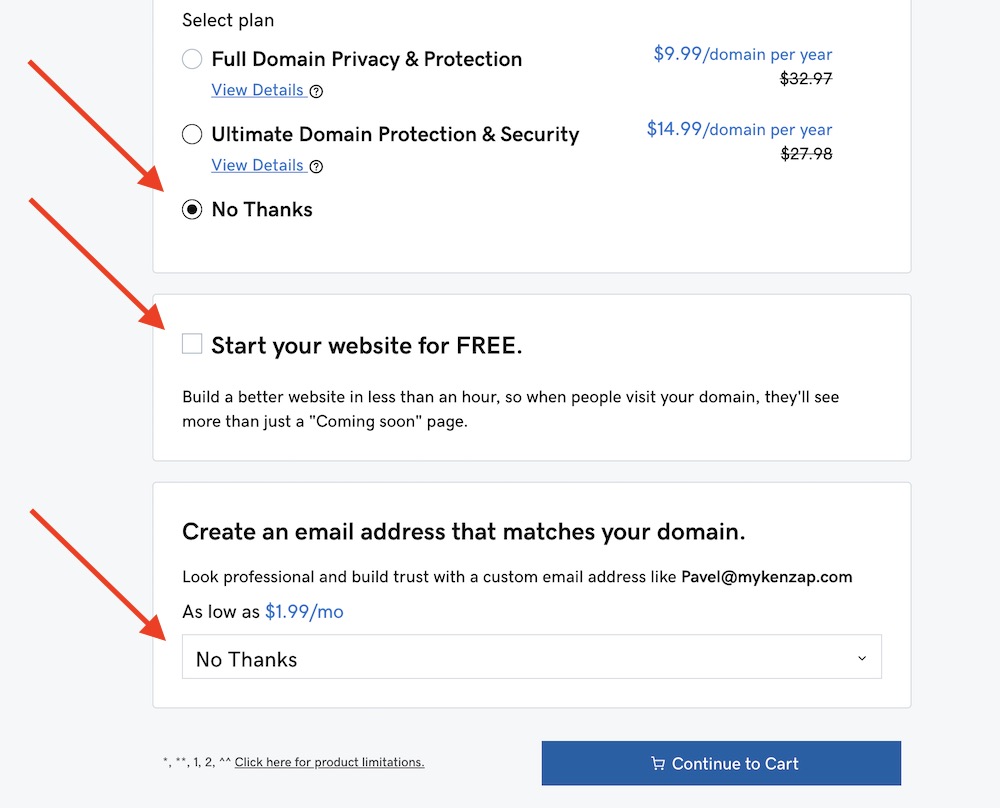
- Untick services you do not need to save on final purchase and hit on Continue to Cart button again.
- Now specify your preferred billing method and domain purchase period: 1, 2, 3, 5, 10 years.
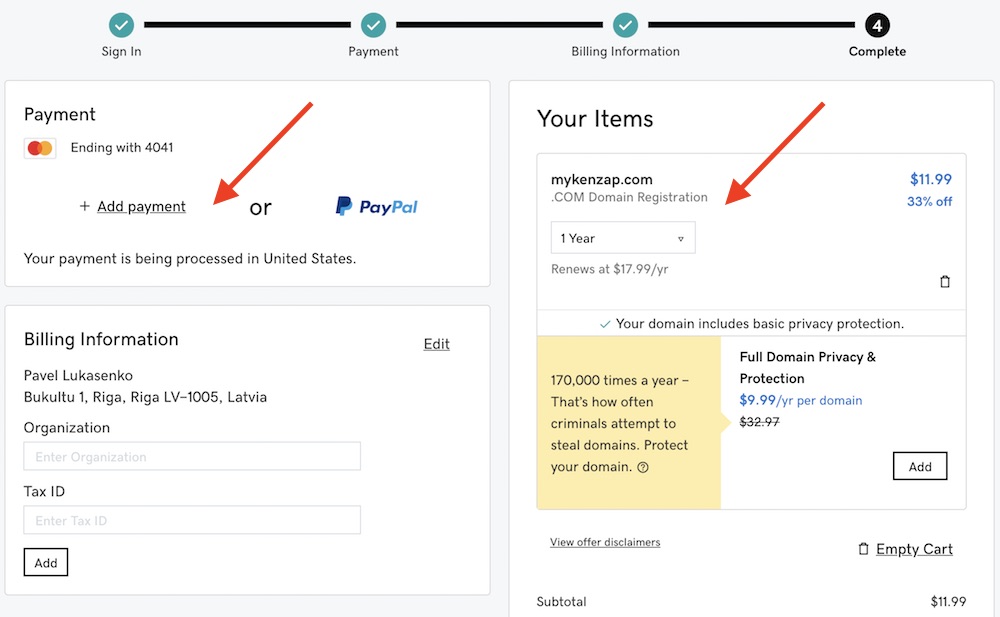
- Finalize your purchase by clicking on Complete Purchase button.
Step 2 – Connecting Domain
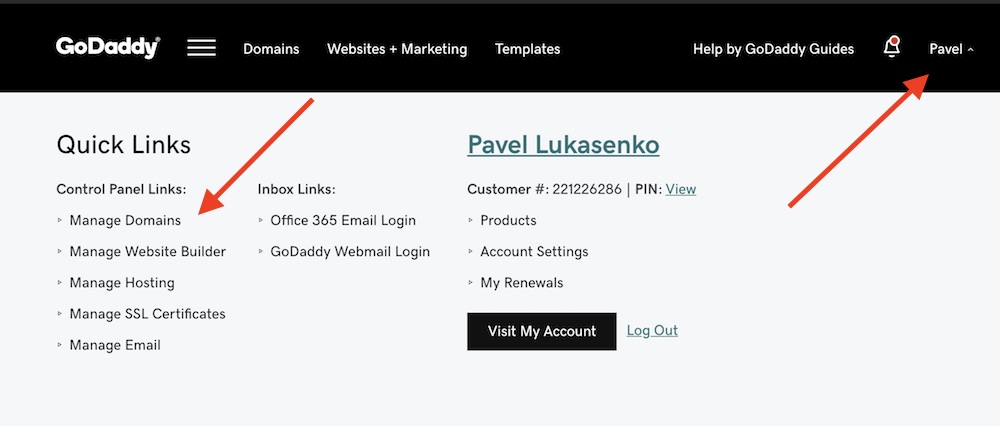
Once the domain name is registered and purchased it has to be pointer to a server where the website is physically located. Go to www.godaddy.com then click on your name in the upper right and then find Manage Domain link.
You will be able to see all your domain names including those that were purchased earlier. Click on three dots and then Manage DNS.
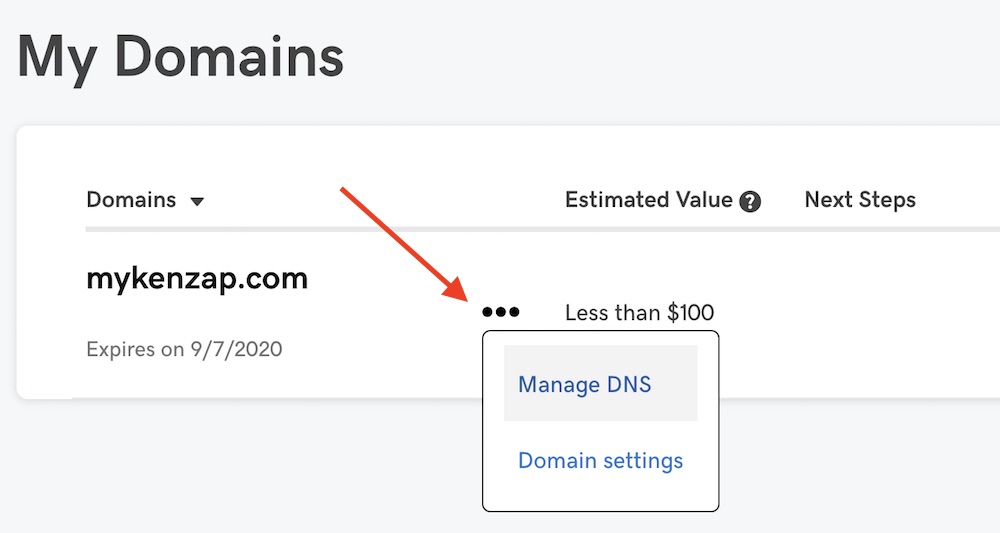
Now you should be able to see DNS Management page.
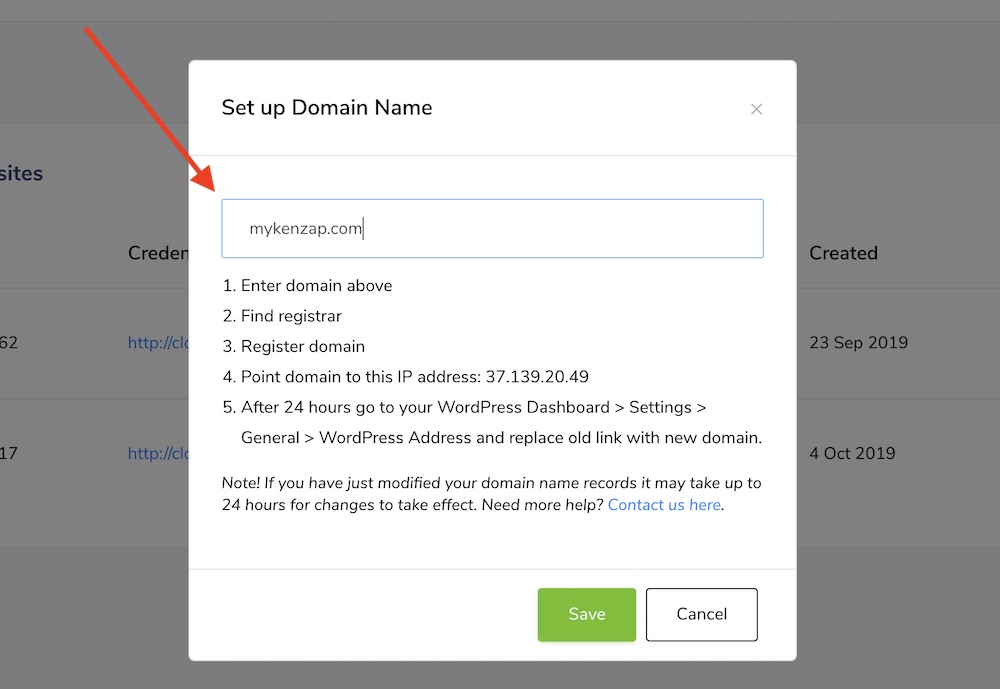
At this stage you need to know the IP address of your your website. You can find by logging in into Kenzap account and click on Option > Change Domain.
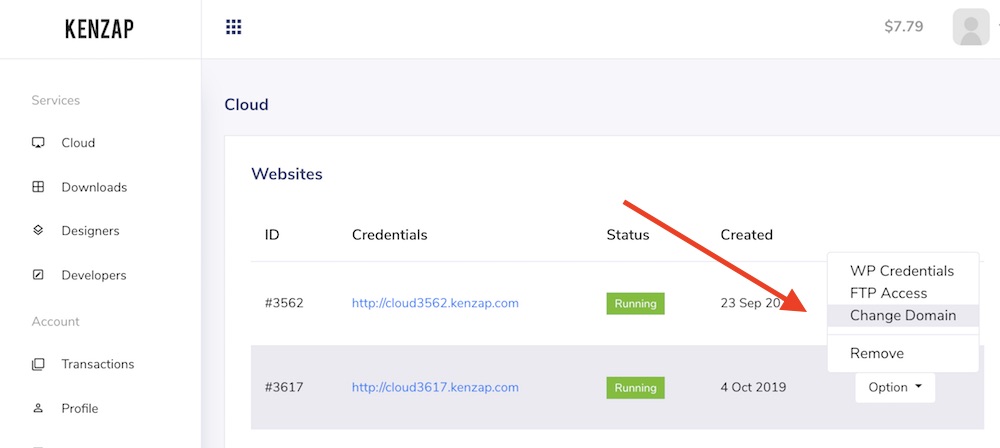
Once you click on the Change Domain you will see a popup window that contains numeric IP address that you need to copy paste to your GoDaddy account DNS manager. Domain name example: 37.139.20.49. Make sure to use that IP address that is associated with your website.
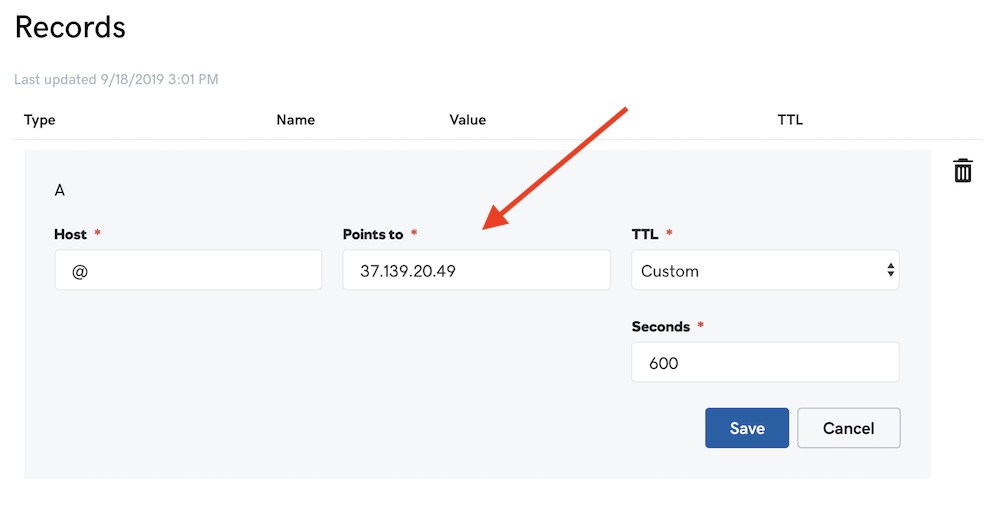
Go back to DNS Management page under you GoDaddy account and find row with letter A. Hit on pencil on the right side to edit this record.

Now paste the IP address copied earlier from your Kenzap Cloud account page. Important! It may take up to 24 hours for the changes to propagate globally through all DNS servers but sometimes it takes less than an hour.
Step 3 – Updating Website Name
Once you finished with the steps described above and eventually waited for 24 hours to past you can now finalize the change of your domain name and update your website name.
Go to your Kenzap Cloud account. Find your website click Option > Change Domain. Provide the domain name under input field.
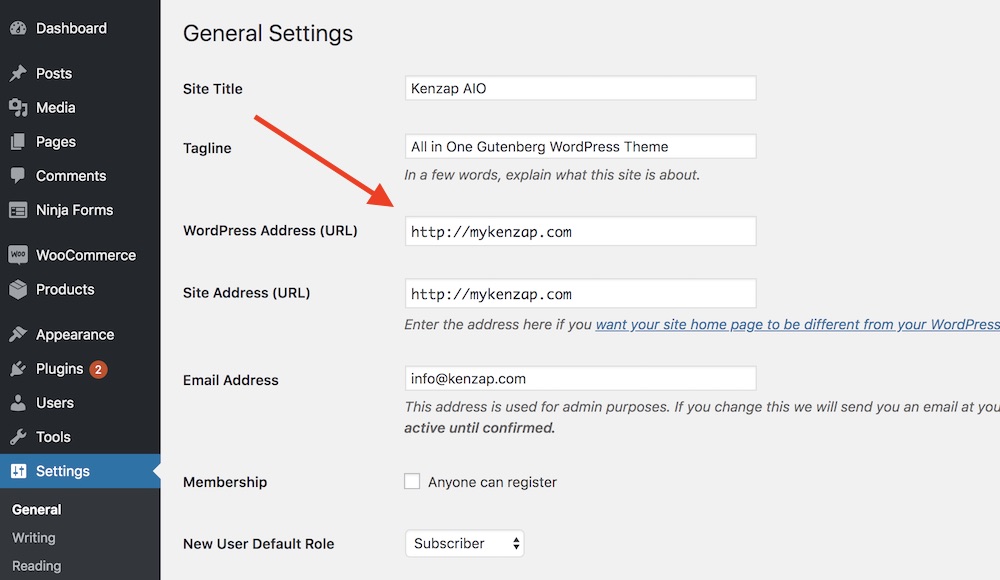
Then log in to your WordPress website Dashboard. Go to Settings > General > WordPress Address and replace old link with the new domain.