When you design your website and create multiple iterations within the same post or page its quite common that you may need to hide certain section (Gutenberg blocks) from website preview.
This short guide will provide a quick overview on how to do in the most optimal way. We recommend two ways:
- Hiding element with the help of CSS.
- Temporary removing block with the help of Add to Reusable Blocks feature.
CSS Approach
These two approaches are fundamentally different. The CSS one still maintains your section in the page and loads it during page preview but the CSS rule instructs browsers to hide it even though it is loaded.
This approach is good if you want to keep the page block structure without any changes but is be bad in a long run and for SEO because the section is still retrieved from WordPress database and being loaded.
Step 1 – Assign Custom Class
Click on the block you would like to hide. Then on right side of you page under Inspector Control’s pane find Advanced > Additional CSS Class input field. This is where you can provide your custom class, example, custom_class.

Step 2 – Create CSS Rule
The next and the last step is to connect this class with a CSS rule that will instruct all elements and its children containing this class to be hidden. The code may look as following and can be copy pasted un Appearance > Customizer > Custom CSS section of your WordPress admin.
Note that there is a dot in front of .custom_class whereas it was not and should not be present under Additional CSS Class input field.
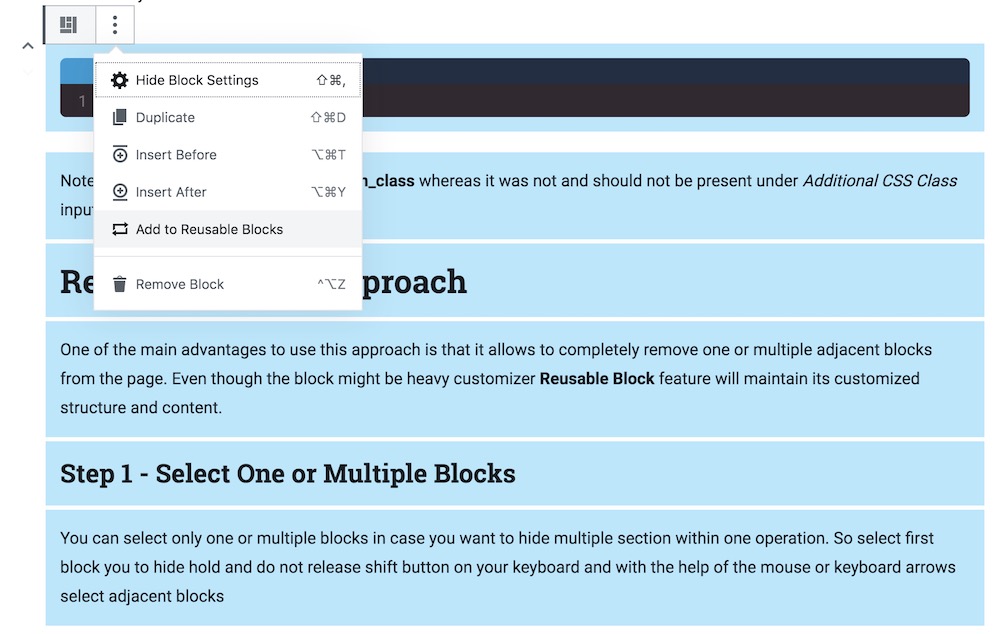
Reusable Blocks Approach
One of the main advantages to use this approach is that it allows to completely remove one or multiple adjacent blocks from the page. Even though the block might be heavy customizer Reusable Block feature will maintain its customized structure and content.
Step 1 – Select One or Multiple Blocks
You can select only one or multiple blocks in case you want to hide multiple section within one operation. So select first block you to hide hold and do not release shift button on your keyboard and with the help of the mouse or keyboard arrows select adjacent blocks.
Note the blue selection color.
Step 2 – Add to Reusable Blocks
As show on the image from the previous section there is a three dot icon. Click on it and then find Add to Reusable Blocks option. This operation will save all customizations and the state of your block. You can now completely remove selected blocks and call that reusable set of blocks under any other WordPress page or post.