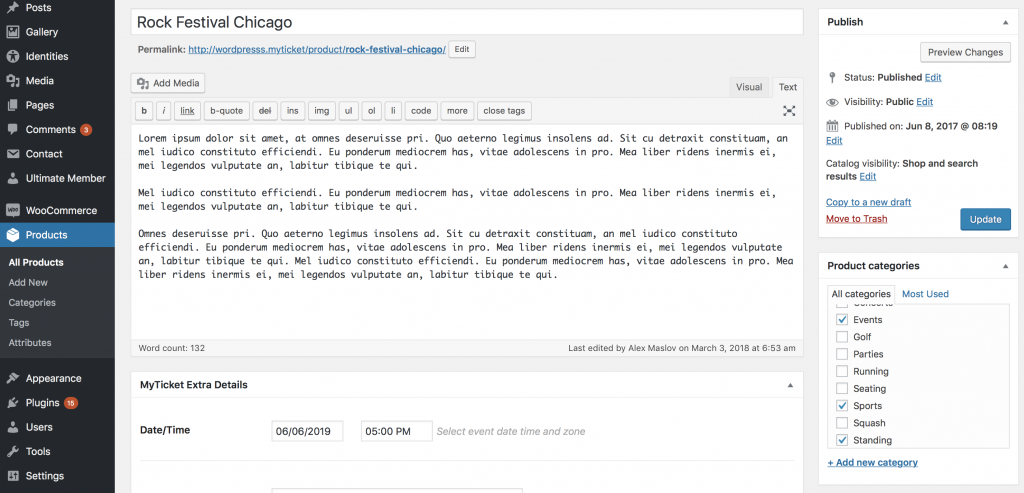
This article will cover an example on how to create your first event with tickets that are available for sale using MyTicket WordPress theme. Login to your WordPress dashboard and go to Products > Add New section. Fill in the basic information like ticket title, for example, “Rock Festival Chicago”, description and assign product categories and tags. See the image below.

For selling and listing tickets this theme relies on WooCommerce plugin functionality. All ticket features like:
- stock management – option to control the amount of tickets to be sold.
- fixed price – default listing price
- price variations – price listing variations
- shipping – ticket delivery options
- product image – main cover image of your event
You can refer to WooCommerce documentation for more details on how to set up a product. In addition, this theme comes with extra parameters that are not covert in WooCommerce documentation. These are:
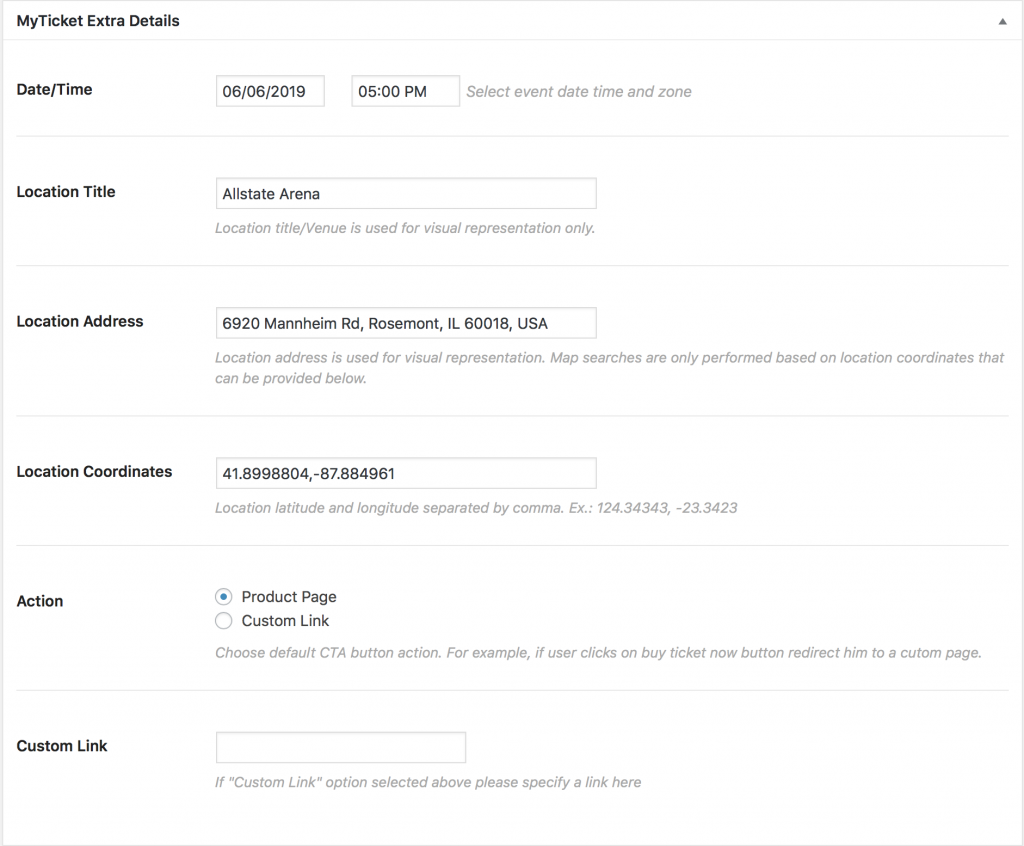
- Date/Time – event date time and zone
- Location Title – event venue
- Location Address – venue address for representation only
- Location Coordinates – Google maps address coordinates
- Action – option that overrides ticket click event
- Custom Link – custom link to be opened once click on the event
- Product short description – will show up during event listings

Extra parameters are important to be filled in correctly as they ensure theme core ticketing functionality and will be used in:
- Event listings. This theme comes with various event listing option including calendars and advanced filtered search.
- Seat reservation and selection.
- QR-code invoice printouts. Invoices can be dowloaded after checkout or sent directly by email.
- MyTicket Mobile app. For ticket validation and information gathering.
- Checkout process.
If you have any additional questions feel free to contact us below.