This article is for those who want to create their Concert Hall, Stadium, or another Venue-related layout in WordPress that supports Seat Reservation and ticket selling capabilities.
Before you continue, please make sure you have:
- WordPress
- MyTicket Events plugin
- WooCommerce plugin
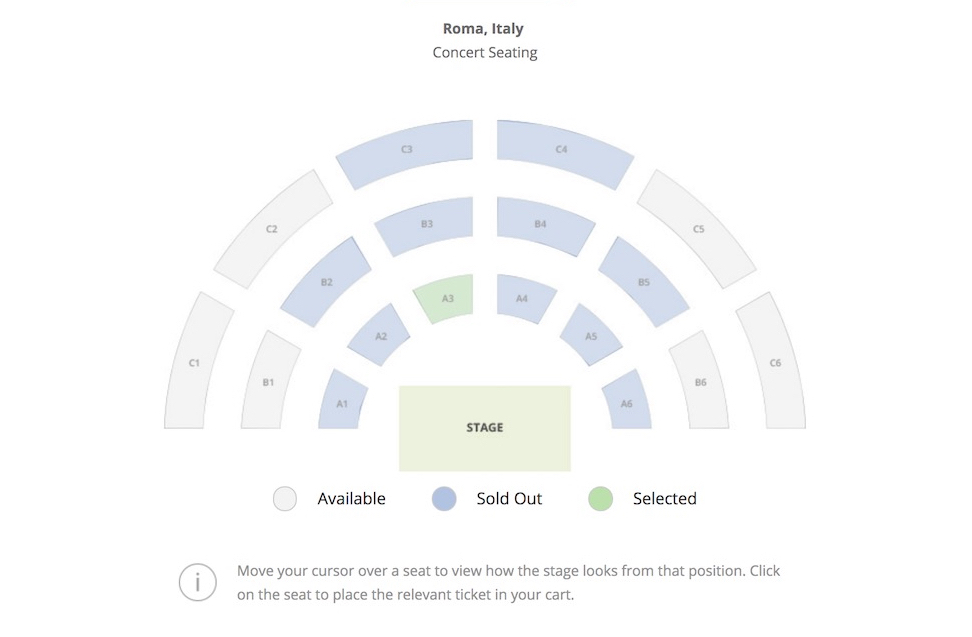
- Image of your layout as shown above
If you do not have a WordPress environment yet, you can use free Kenzap Cloud for test purposes with demo hall layout already loaded in the product or refer to live hall demo preview.
You can also contact Kenzap support team for professional paid assistance.
1. Create Zones
To start creating your first seat reservation layout, you first need to assign logical zones and link them with your layout image. For this purpose, you can use our online image mapping software. Go to your cloud account then Other Services > MyTicket.
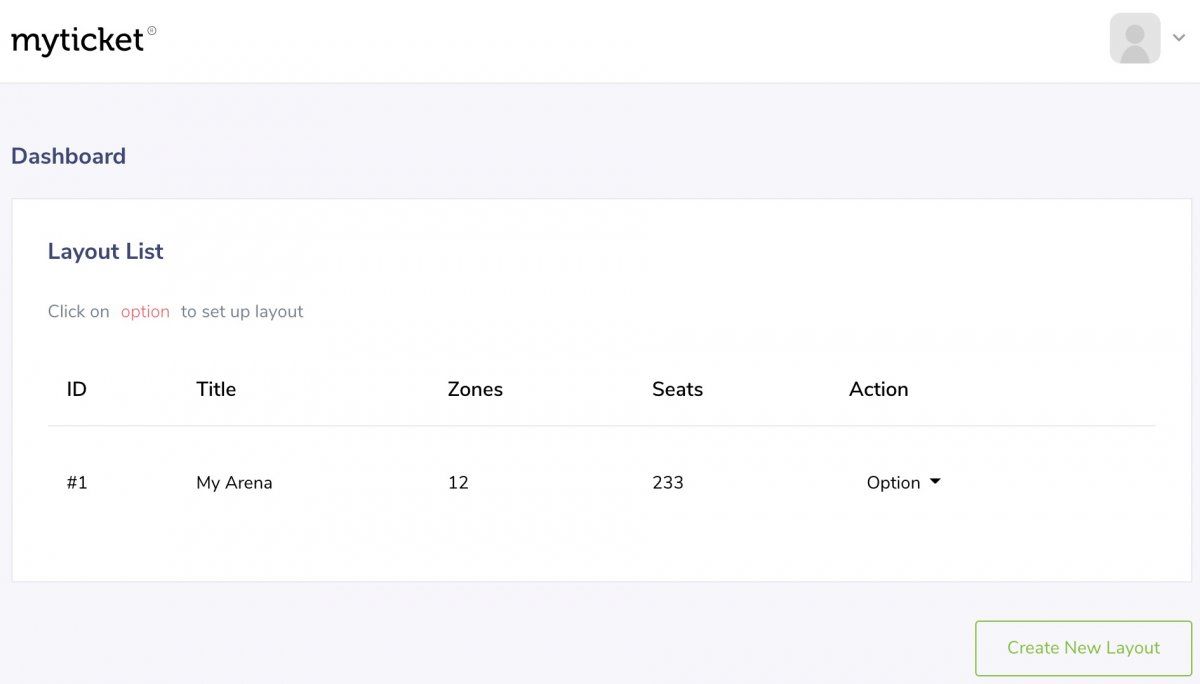
The image above shows MyTicket Dashboard. Click on Create New Layout button and provide the layout title. After you create the layout, a new row will appear. Click Option > Edit to continue. In the new window, drag and drop your image into the “Drag an image of your layout below” container then, Upload This Layout.
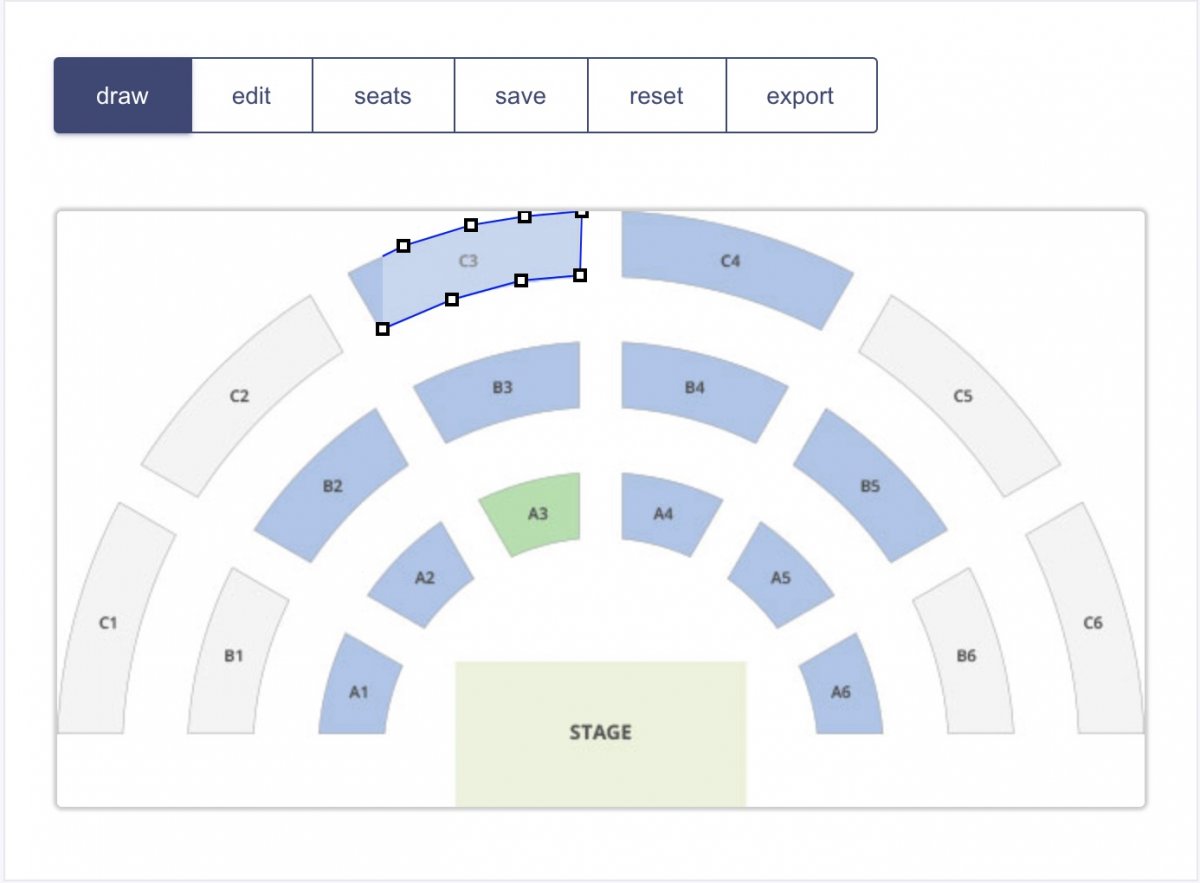
Now you can start drawing zones on top of your image layout. With your left mouse button, click on the place you wish to start drawing (usually a corner of a sector) and navigate the mouse cursor to the upcoming location, where you want to fix the position of the line. Continue till you reach your starting point by clicking exactly on the same square dot.
In this way, you can create custom-shaped zones like Rectangular or Polygon that repeats certain elements of your layout image.
To cancel the zone drawing, click on the ESC keyboard button. Note that this will not affect previous zones.
There is a tabbed navigation bar above the drawing area that supports the following functionality:
- draw – turns on zone drawing mode as just explained above.
- edit – zone customization mode (reshape, relocate, rotate).
- seats – mode to assign seats to the zone.
- save – permanently stores changes stored under your account.
- reset – remove exiting layout and start from the beginning.
- export – export layout to your website.
During edit mode, you can modify created zones. For example, click on the zone’s dot to relocate adjacent lines or click on the zone area itself to move it all to another location. Note, you can use mouse or keyboard arrow keys during this operation.
To remove the zone click DEL keyboard button while it is selected.
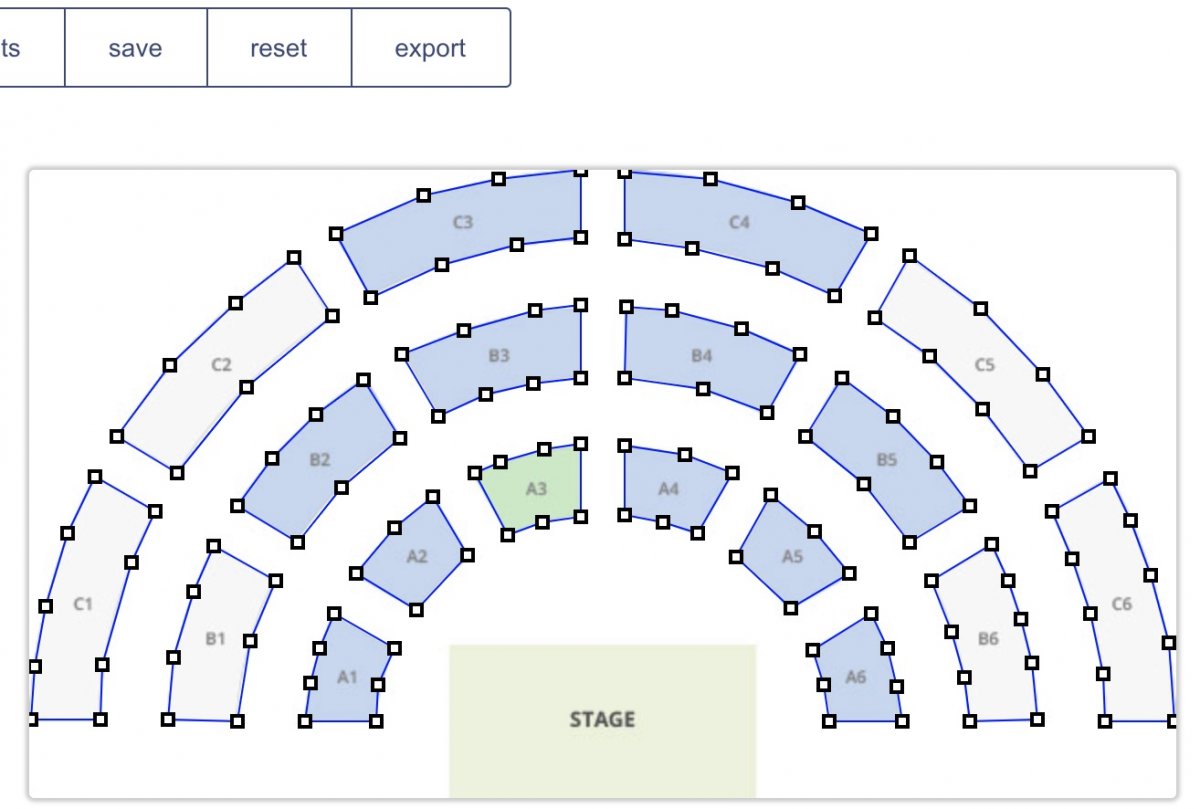
When all zones are attached to the image, you can create a seat map, that is available for individual ticket reservations.
2. Allocate Seat Map
To initiate seat allocation, from the navigation tab above you need to switch to seats mode and select the zone that you want to edit. The modal window will show up. Before you click continue, fill in the following information:
- Number of tickets without seat reservation
- Number of tickets with seat reservation
Now drag and drop seats one by one into the zone. Make sure to adjust seat size with the help of a slider in the top left corner of the screen. By default, each seat has a number displayed in the middle of the circle.
Once the seats are allocated to the zone, you can enter custom seat and row numbers as this information will be used during the booking process and displayed upon checkout and PDF Ticket printout. After seats are attached to the zone, close the window by clicking on the red cross.
Do not forget to save changes by clicking on save button from navigation bar. This will keep your recent modifications even if you reload the page or close browser’s window.
Repeat seat attaching procedure untill all zones are finalized.
3. Publish Hall Online
Now that all the zones are created and seats attached it is time to publish your interactive seat layout on your website. Click on the Export button from the navigation bar and copy the JSON code from the window provided. Then under your WordPress admin, go to Pages > Add New and find MyTicket Hall Gutenberg block.
Note that this step requires MyTicket Events plugin installed.
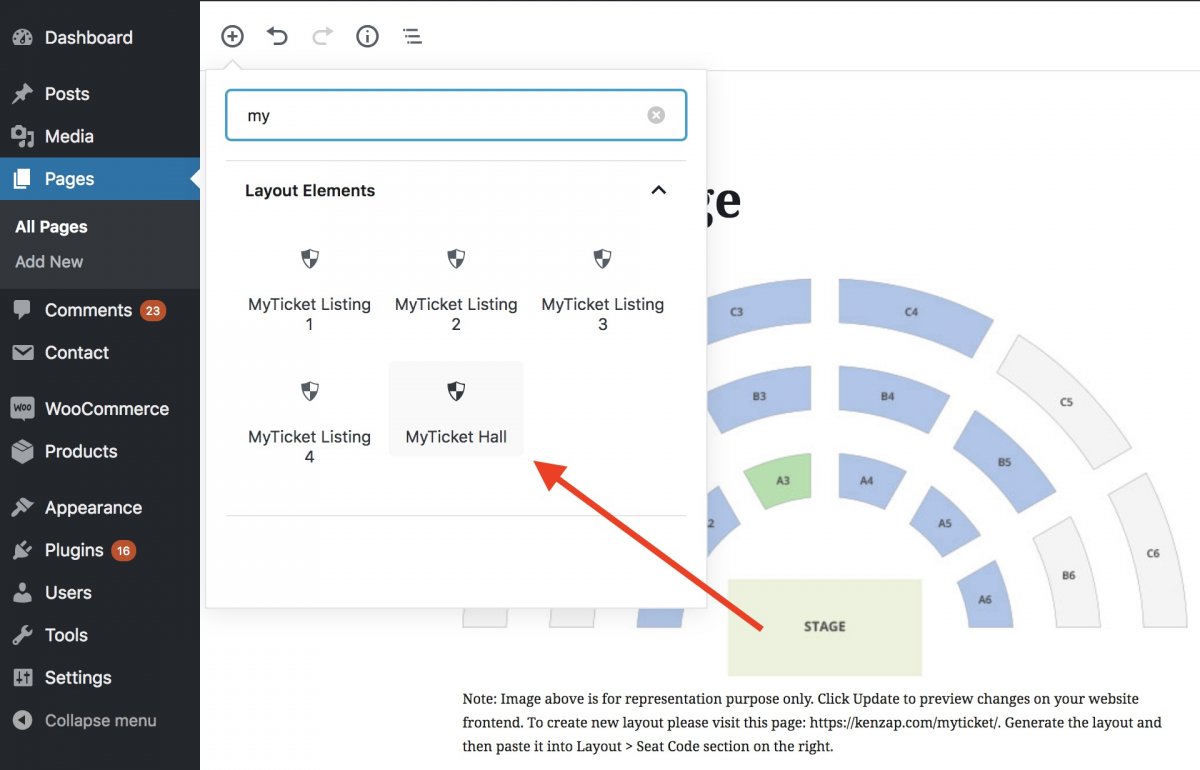
Once the block is added to the page it will automatically load the default hall placeholder. This is for representation purposes only and will have a different preview on your website frontend. Make sure that the block is in focus so that it loads additional settings pane on the right.
Under this pane find Layout > Seat Code and paste the JSON code that you copied earlier.
Under the right pane you may find other various settings related to widths, paddings, colors etc.
For imports of layout with 5000 seats or more it is recommended to use alternative layout saving option. Please refer to Importing Layouts with 5000+ Seats guide.
4. Link WooCommerce with Reservations
Now your website has a working and interactive hall layout integrated. It responds to hover events and seat selection but it is not yet linked with WooCommerce and not ready to sell tickets online.
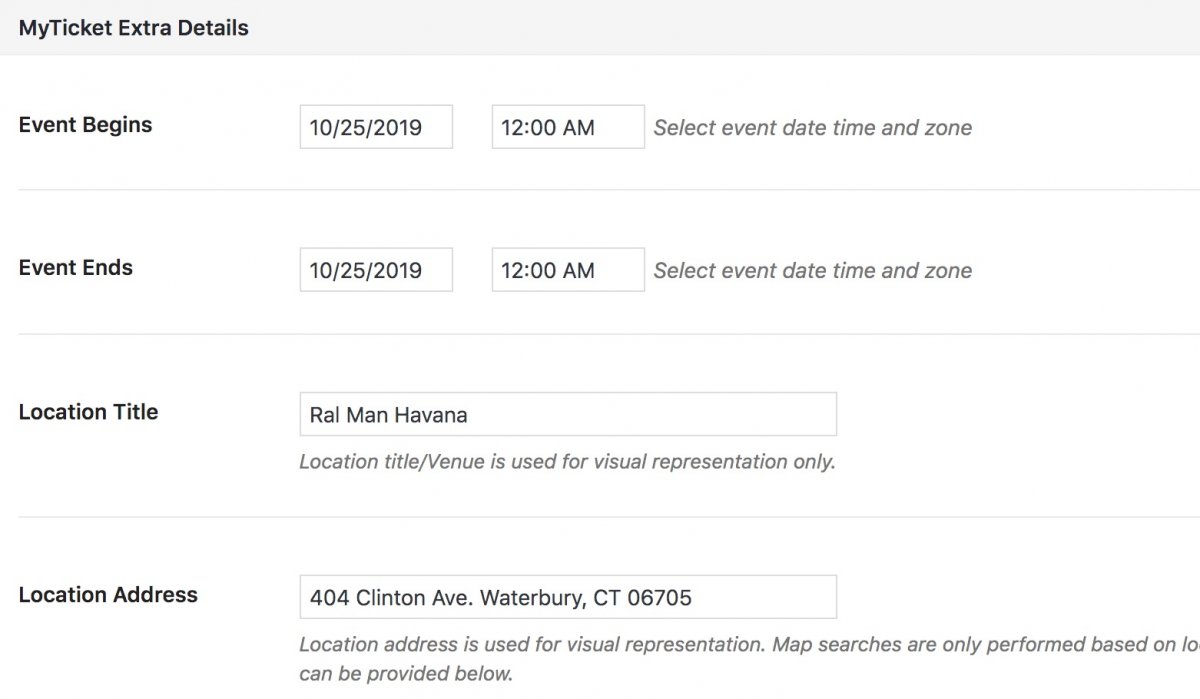
In order to solve this go to products section from your WordPress admin, create new product, populate MyTicket Extra Details box:
- Event begins
- Event ends
- Location Title
- Location Address
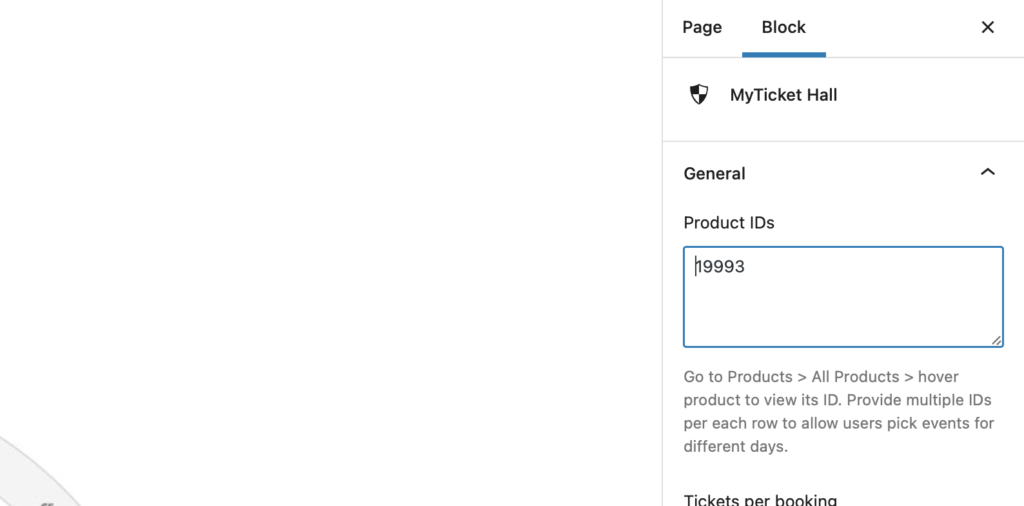
Now find the product ID number from the URL of your browser. Some browsers may hide it before you click the URL window. Based on the example from the image below the product ID is 2577.
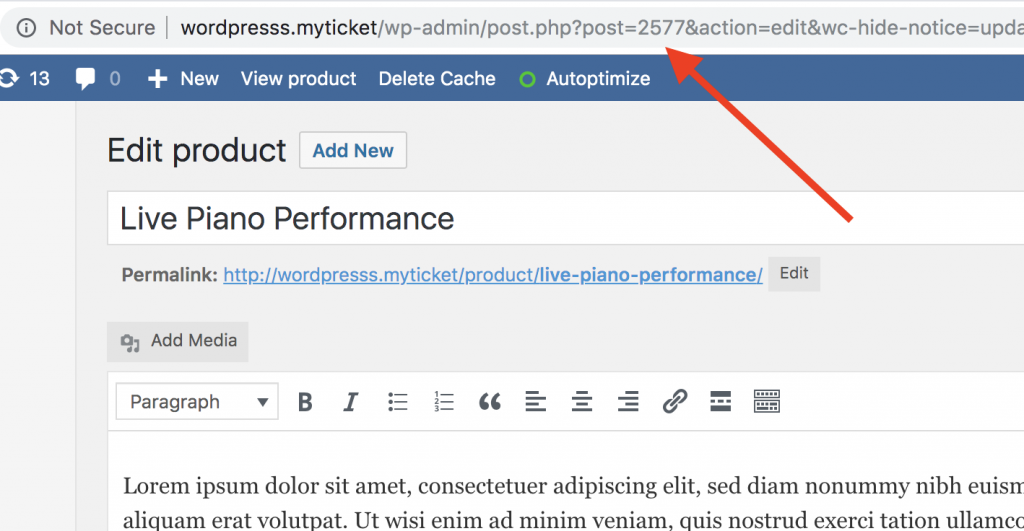
This product ID should be copied to MyTicket Hall > General > Product ID settings under the pane on the right, see the image below.
This should be enough to start selling your first tickets with seat reservation using custom hall/stadium layouts.
5. Pricing Models
There are various ways how you can setup prices for the layout.
Simple mode
Simple mode is the fastest way of setting up the price for the layout. Skip any price declaration under MyTicket Dashboard.
When no default price is provided under the Dashboard both for the entire zone via popup window and for the individual ticket then the price will be automatically taken from the WooCommerce product linked with the layout.
Refer to the previous section to learn more how to link the layout with the WooCommerce product ID.
In simple mode one fixed price is used for the entire layout.
Custom mode
During custom mode you can set up custom price for each seat individually. You can also set one price for the entire zone so that you do not need to declare each seat price one by one. This is useful when you only want to differentiate prices on the zone level rather than to set up price per each seat individually.
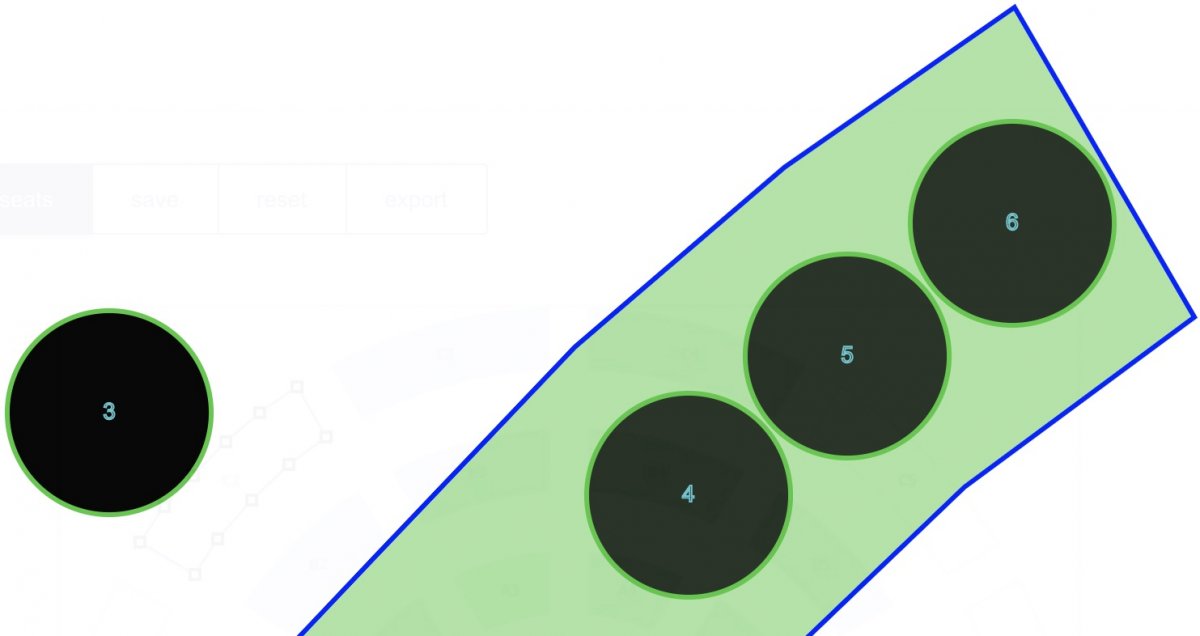
The image below shows an example how to set up custom price for the entire zone. Click on seats button > click on desired zone > set the price under the popup window.
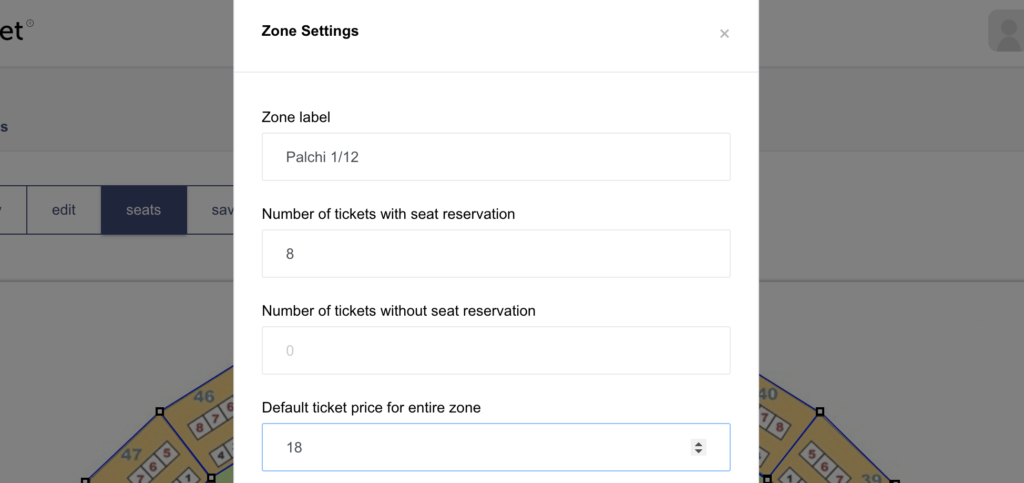
Please note that you can also override each individual seat price during seat mapping mode. Confirm popup window settings by clicking on Continue button.
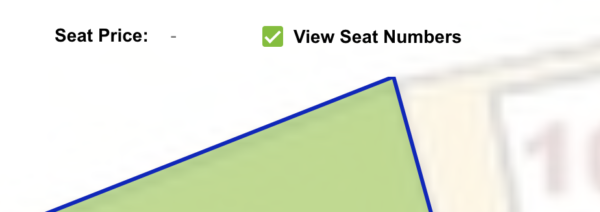
Under seats mapping mode click on the seat and under the top bar find Seat Price input field as show in the image below.
Variable mode
Variable mode allows you to have custom pricing model while also adding price variations per each zone individually.
Click on seats button > click on desired zone > click on add price variation. Refer to the image below for more details.
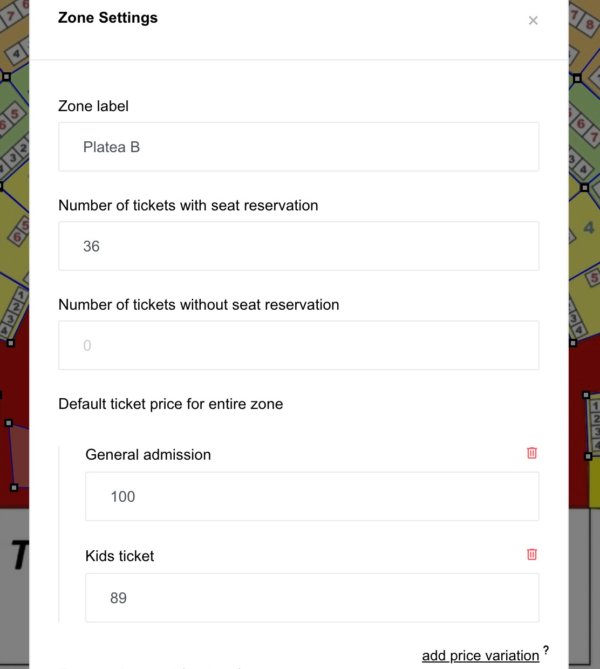
Once new variable fields are added in the popup window you can also adjust the labels by simply typing on top of the existing texts. Make sure to click Continue button each time to confirm latest text and price modifications.
As of now your website is ready to accept bookings with variable and custom pricing options, however, you may wish to pass variable labels to the checkout.
For this reason go to Appearance > Customizer > MyTicket > Checkout > Checkout fields and add the following checkout field with ticket_text as the field key.
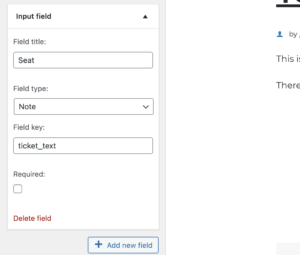
Please also refer to Custom Extension Fields section to learn more on how to pass custom fields to the cart, checkout and the PDF tickets.
6. Keyboard Shortcuts
While working with large hall layouts such as stadiums, assigning every seat manually might be extremely challenging and time-consuming. With the MyTicket Events cloud dashboard, you can rely on additional tools that can dramatically save your time and help you skip manual drag and dropping techniques.
Duplicate or Rotate Zone
During Edit mode you can copy paste the zone by clicking Ctrl + C on your keyboard. This operation will make an exact replica of the zone and all of its seats.
Use Ctrl + U to rotate selected zone clockwise or Ctrl + J to rotate the zone counterclockwise.
Auto Allocate New Row – Key D
When you open the zone, you can see that all of the seats are placed in the top left corner of the screen. You can start auto aligning seat row by row by clicking on the D button on your keyboard. Here is how it works:
- Click on the D button on your keyboard
- Type the number of seats to allocate, for example, 12.
- Click on the zone area with your left mouse button to set the first seat of the row.
- Click a second time on the left mouse button on the zone area to set the last seat of the row.
- All other seats between the first and last seats will be allocated automatically.
Auto Realign Existing Row – Key A
When you assign a seat to the zone manually, you probably have noticed that most of the seats are not accurately aligned. To bypass this limitation, you can hold A letter on your keyboard and hit on the first seat in the row, and then without delay on the last seat from the same row while still holding A letter pressed.
Auto Assign Seat Numbering – Key Q
To assign a custom price, seat number, and row number to multiple seats at once, use Q command. Hit on the Q button on your keyboard and slowly directly through each seat within the desired seat. Each next seat will take the same price and row number from the previous seat while incrementing the seat number by 1.
Move seat – Key Arrows
Use arrow keys both to relocate the zone or individual seats inside the zone. With every arrow keyboard click the zone or a seat is moved by one pixel only. This makes it very convenient to perform small adjustments in the layout.
Revert Changes – Key Z
When you made a mistake while aligning the seats you can easily revert changes back by pressing Ctrl + Z on the keyboard.